How to Install a SSL Certificate
Total Uptime gives you the ability to load a SSL certificate and key pair for use in SSL offload or decrypting the SSL session in order to insert client IP headers. This article describes the process of retrieving your certificate and key files from a Linux web server, uploading them, and pairing them in our user interface.
NOTE: Please follow this article to retrieve your certificate and key files from Microsoft’s IIS Server.
Prerequisites
In order to follow this guide you will need a Linux server running the Apache web server and using an authorized(not self-signed) SSL certificate and key file. The server used in the following steps is running Ubuntu 14.04 and Apache version 2.4.18. The certificate file in the following example is named www.test.cc.crt and the key file www.test.cc.key.
STEP 1: Copy files to user home directory
The default SSL file location for Apache is /etc/ssl/certs for the certificate and /etc/ssl/private for the key. Log in to the server with a user account which has the ability to run commands as root and run the following commands:

These commands copy the certificate and key files to your user’s home directory (represented by the ~ character). You will be asked to enter your password when running the first command.
STEP 2: Download files from the server
Next you will need to download the certificate and key files from the server.
Your Linux server should have openssh-server installed to allow SSH connections. This also allows for secure FTP connections because, like SSH, it uses port 22. If openssh-server is not installed you may do so by running the following command:
![]()
Next, on your computer, open an FTP client capable of using port 22 for secure FTP (FileZilla in the example) and enter the server FQDN or IP address, your username and password, and port 22, then click the connect button.

You will be logged in and see your local files on the left and the server’s files on the right. Find the certificate and key file in the right pane and drag them to the left pane to copy them to your computer.

Disconnect from the secure FTP session.
STEP 3: Upload files to Total Uptime
Open a browser and navigate to https://manage.totaluptime.com. Log in and select the NETWORKING tab, then the SSL tab.
Upload the SSL key
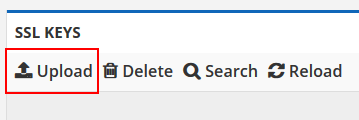
Upload the SSL key file by clicking the ‘Upload’ button under the SSL KEYS section.
Click the ‘Choose File’ button, find and select your key file, and click the ‘Open’ button.
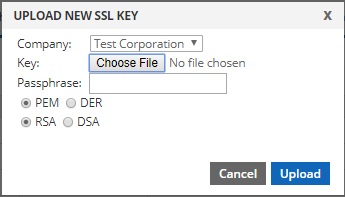
If you have specified a passphrase for the key, enter that in the ‘Passphrase’ text box.
Select the matching encoding (PEM or DER) and algorithm (RSA or DSA).
Click the ‘Upload’ button.
You will receive a message that the key was uploaded successfully. Click the ‘Ok’ button.
Upload the SSL certificate
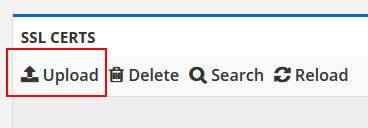
Upload the SSL certificate file by clicking the ‘Upload’ button under the SSL CERTS section.
Click the ‘Choose File’ button, find and select your certificate file, and click the ‘Open’ button.
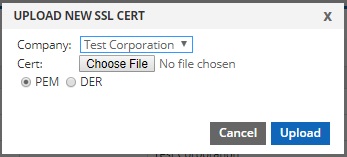
Select the matching encoding (PEM or DER).
Click the ‘Upload’ button.
You will receive a message that the certificate was uploaded successfully. Click the ‘Ok’ button.
STEP 4: Pair the certificate and key files
Now you should have successfully uploaded both your certificate and key files. The next step is to pair them and link an intermediate certificate.
Pair the certificate and key files by clicking the ‘Add’ button under the SSL KEY/CERT PAIRS section.

Give the pair a name, select the key and certificate in the drop-down menus, then click the ‘Save’ button.

You will receive a message that the pair was created successfully. Click the ‘Ok’ button.
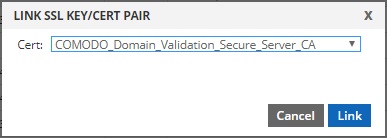
Link the pair with an intermediate certificate by selecting the pair you just created, then clicking the ‘Link’ button under the SSL KEY/CERT PAIRS section.

Select your certificate provider’s intermediate certificate in the drop-down menu, then click the ‘Link’ button.
You should receive a message confirming the successful linking of the intermediate certificate. Click the ‘Ok’ button.
NOTE: If your intermediate certificate does not appear in the list, please submit a support request to have it added.
Conclusion
You should now have a certificate and key pair uploaded for use in SSL offload or decrypting the SSL session in order to insert client IP headers. The next step will be to create a pack and attach the pair.