
The denial-of-service or DDoS tab provides two primary functions. Front-end DDoS Statistics and mitigation, and Back-end denial-of-service mitigations.
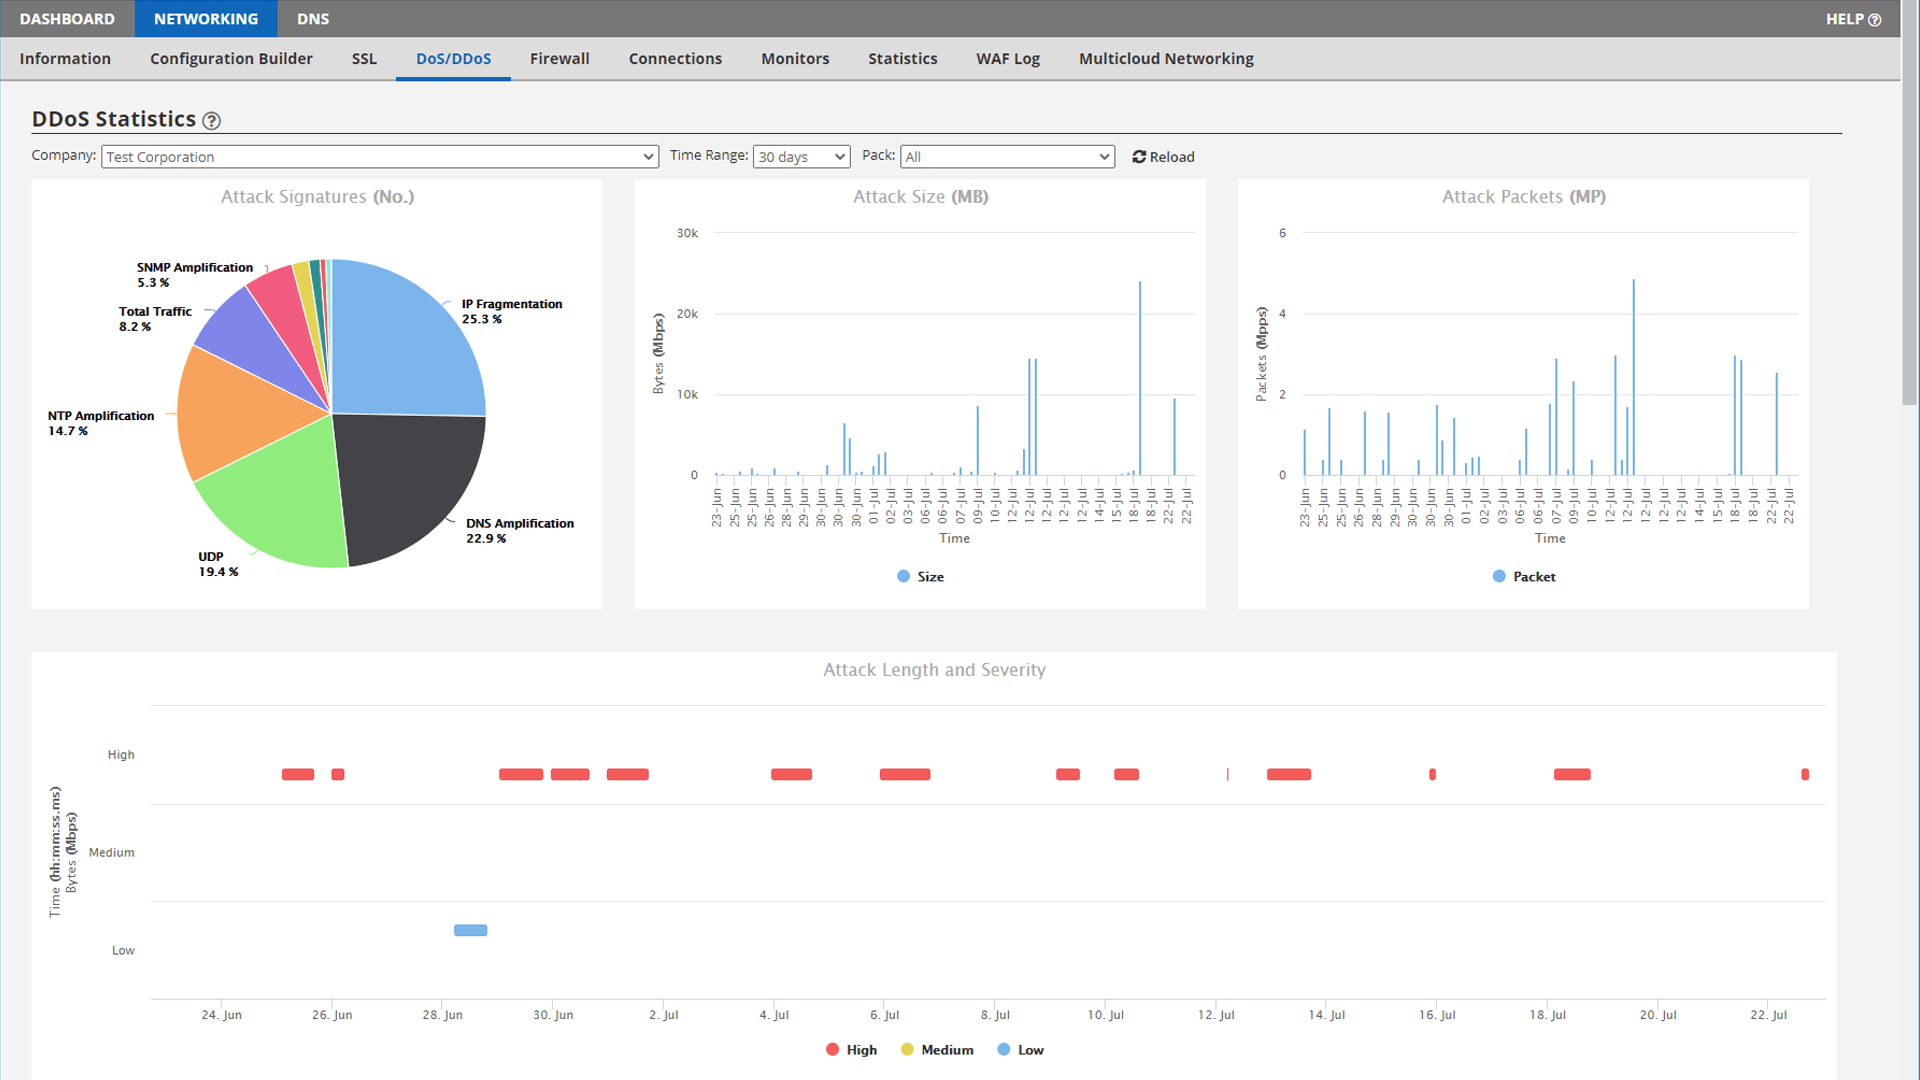
In the top half of the page are DDoS statistics. Here you can see detailed information about attacks toward your packs. The drop-down menus allow you to choose the time range and a specific pack, if desired. If attack data is available, it will be displayed in the charts at the top of this page. Further down the page is a data table. This provides detailed information about each attack type by date and time along with the pack name, the attack signatures and size of the attack. You can page through these results or export them as needed.
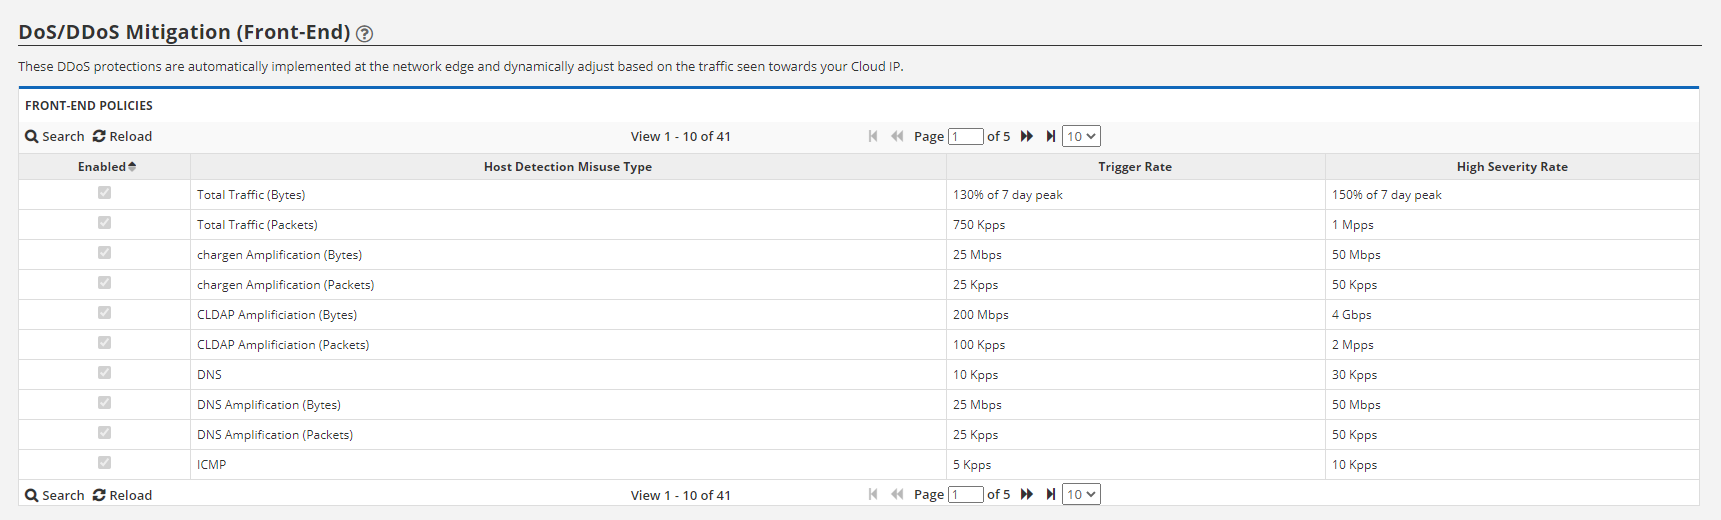
DoS/DDoS Mitigation (Front-End)
This table shows the settings for the front-end DDoS mitigation policies. These are the pre-set thresholds that must be met before attack data will be gathered and displayed on the charts and graphs above. This does not mean we do not detect or block attacks lower than these thresholds. In fact, we do, but because small attacks are so frequent, we do not retain the attack data simply due to the sheer volume. Attacks exceeding these thresholds are generally seen as threatening and are therefore logged.
DoS/DDoS Mitigation (Back-End)
The back-end DDoS protection system is designed for HTTP (and HTTPS, when using SSL and a certificate) protection. By default, when you subscribe to the Web Application Firewall, our platform already protects your application from typical SYN, UDP, ICMP, PUSH, slowloris, ACL floods: LAND, smurf and teardrop attacks, and other popular attacks at the network level without having to do anything. By configuring this feature, you add HTTP DDoS protection. With it, we protect against common HTTP slow POST, recursive GET floods and other HTTP-based attacks by sending a low-impact computational challenge to a percentage of the connections. The challenge is easily answered by legitimate clients, but DoS bots cannot. This allows us to quickly drop invalid bot requests that overwhelm your server(s).

Add – Select “Add” to add a new DDoS policy. 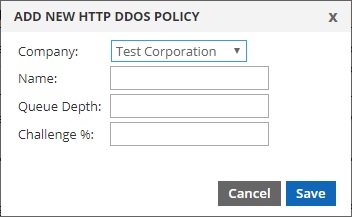
- Company – If you have a reseller account, you’ll be able to select the sub-company (or parent company) that your DDoS policy will be created under. A sub-company (or parent company) can only use DDoS policies created under their account.
- Name – Choose a name for your DDoS policy. This is the name you’ll see when assigning your policy to a server.
- Queue Depth – This is the maximum number of connections you want your server(s) to handle naturally, without intervention by the DDoS Protection system. It is recommend to set this to about 80% of server capacity. For example, if your server can easily handle 1000 connections per second, set this number to 800. When the number of connections reaches this, protection mode is triggered.
- Challenge Rate (%) – After protection mode has been triggered, this is the percentage of responses that are challenged. Default is 1 (%). Raising this is most likely required. We recommend starting with 50 (%) and slowly increasing (if needed) every few minutes during an attack until service is restored.
Edit – Select the desired policy and then click “Edit” to alter the policy’s settings.
Delete – Select the desired policy and click “Delete” to remove a policy. You cannot delete a policy that is assigned to a server.
Search – Search for a specific policy.
Reload – Refresh the window.
Manage Bindings – Press “Manage Bindings” to bind a policy to your server. DDOS policies are bound on a PER PORT basis. This can also be done in the “Ports and Protocols” section under server management. Be sure to define Max Clients and Max Requests that your server can handle when creating the policy. If not done properly DDOS protection will not function as it should.
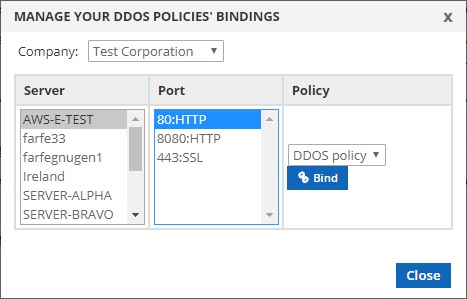
Company: First select the sub-company (or parent company) you’d like to manage the bindings for. Only servers and policies under the selected company will appear in the fields below.
Server: Select the server that you’d like to bind a policy to.
Port: Once you select a server, this field will show all the ports that server has open. DDoS policies are bound to servers on a per-port basis, so you must select each port separately that you’d like your policy bound to.
Policy: Select the policy you’d like to bind to the server/port from the drop-down list and press the “Bind” button. You can only bind one policy to each port on a server. After you’ve bound the policy to the port, the drop-down list will not appear, and you’ll see the name of the DDoS policy bound to the port, and an “Unbind” button. like so;
