

You can add a user by clicking on the “Add” button. You will see this screen displayed to add your user’s details with: Fields with an asterisk (*) are required fields
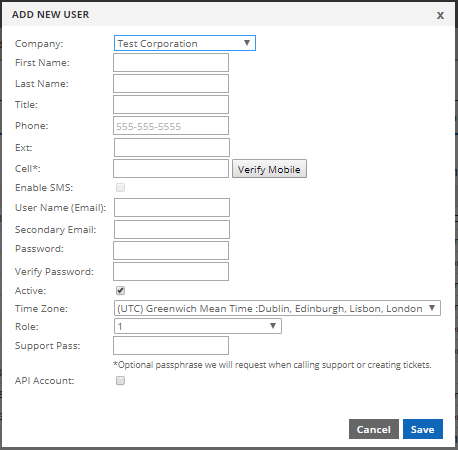
- Company Name*:

Select which company or sub-company the user is being created under from the drop-down list. - First Name*:

User’s first name. - Last Name*:

User’s last name. - Title:

User’s title (Mr. Ms. Miss. Mrs. etc…) - Phone* & Ext:
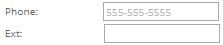
User’s contact phone number. - Cell:

User’s cell phone number. *If the company has Dual Factor Authentication enabled, this field is required.- Verify Mobile:

If the company you’ve selected has Dual-Factor Authentication enabled, you will also see a button that you can use to send a verification text from our system to the user’s cell number. This is highly recommended, as it will ensure that the user can receive these SMS messages.
- Verify Mobile:
- Enable SMS:

Enable SMS alerts to be sent to the provided cell number. This is necessary if the user will be added to any alert lists and wishes to receive those alerts via text messages. - User Name (Email)*:

This is the user’s login username, as well as their primary email address. This must be a valid email address. - Secondary Email*:

Please enter a backup email address in case we cannot reach you on the primary email address. This is a required field, so if you do not have a secondary email address then simply put your primary email address in here as well. This must be a valid email address. - Password* and Verify Password*:

Please select a password to log in with.
*Password must be at least 8 chars, and contain an uppercase letter, a number, and a special character. - Active:

Indicates whether you’d like to give this user access to log in to the UI. An inactive user will still be able to receive alerts if they’re part of an alert list. - Time Zone:

Select the time zone that the user will be logging in from. This will alter what time/date-stamp is placed onto your alerts. It will also affect several tables within the UI, such as the Server Status and the Change Logs. - Role:
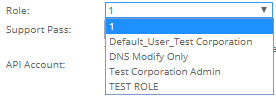
Select the security clearance (i.e. “Role”) your user will have from the drop-down list. The roles available in the drop-down list will depend on the roles created for that specific company. You can create your own role in the “Roles & Security” tab, or select one of the default roles available when you create your company. - Support Pass:

If you wish to have additional security for when someone contacts our help desk for assistance, then please provide us with a Support Passphrase we can ask for to verify your identity. If you provide us with a Support Passphrase, then we will not make any changes or release any information without first getting the passphrase from you. This is an optional feature, as we always make efforts to ensure your settings are not altered without your approval. - API Account:

Select this option if you want the user account to have API access.