
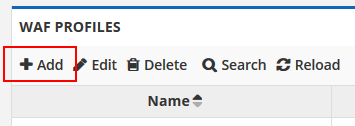
To begin, you need to create a WAF Profile. To do that, click the ADD button on the toolbar in the table as shown below:
Give your profile a name that describes the functionality you are going to deploy. We do not suggest naming it the same as your config/pack because WAF profiles can be applied to multiple configs. Don’t worry, it is easy to change the name later.
Once you’ve created your profile, you’ll see it in the table below. Double-click it, or select it once and choose EDIT from the toolbar. This will open up a new window as shown below:

As you can see, there are numerous options available. To engage an option, you simply check the BLOCK checkbox beside the name. But before you do so, you may wish to click the “Advanced” ![]() link beside the profile items you’re interested in to configure the advanced settings. Some items will work out-of-the-box without much configuration to offer basic protection. Some require advanced configuration.
link beside the profile items you’re interested in to configure the advanced settings. Some items will work out-of-the-box without much configuration to offer basic protection. Some require advanced configuration.
Example: Buffer Overflow advanced settings:
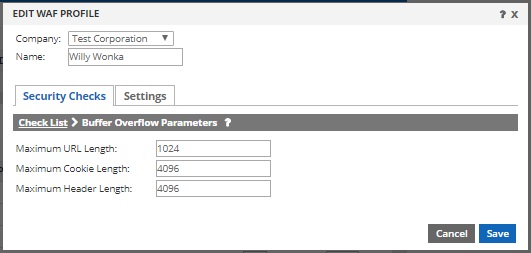
For Buffer Overflow, there are very few settings, and they are configured by default. So this rule generally requires little modification to begin protecting your web application.
Other items, like SQL Injection, may require a little more configuration to ensure it works properly with your application. For many, exceptions are generally required and we highly recommend testing before engaging these features in production.
Implementing your WAF Profile
Once you have finished implementing a profile, unlike the Firewall ACL, it needs to be connected to your config/pack before it will begin providing protection. To do that, click on the CONFIGURATION BUILDER tab and choose your config/pack from the left hand side. This should open it up to the main configuration page as shown below.
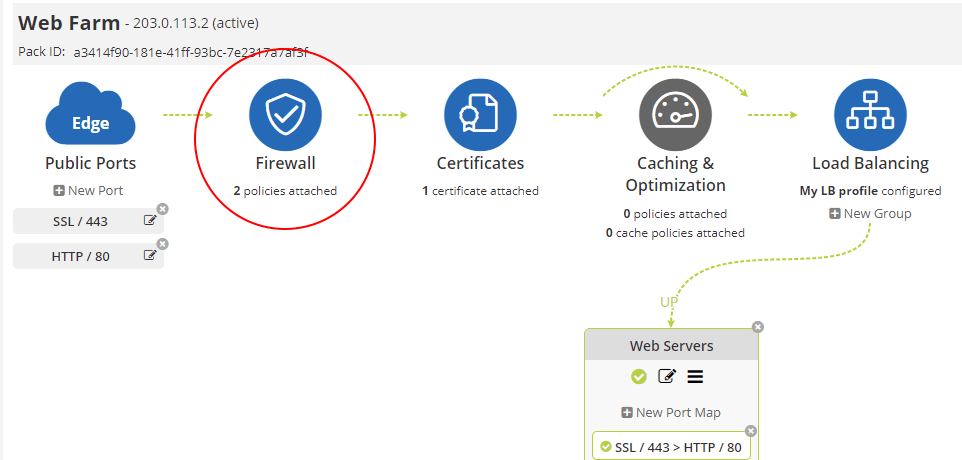
Click on the Firewall button as shown above to open up the configuration dialog as follows:
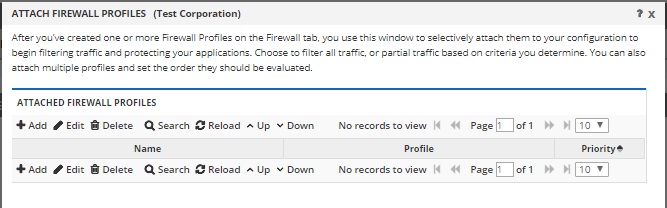
To attach the profile you created, click the ADD button on the toolbar. This will open a window as follows:
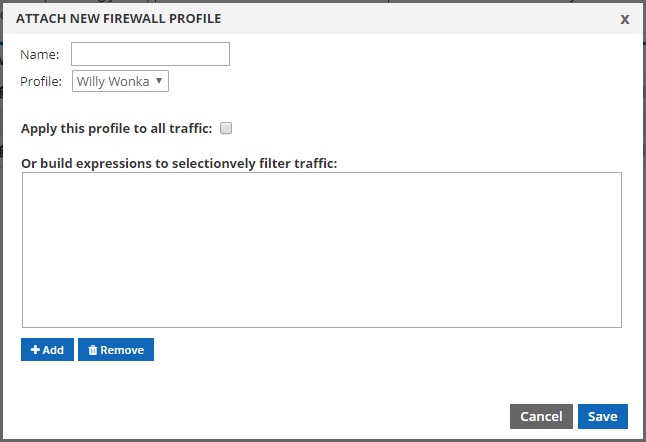
In this window you can now choose the Profile you previously created from the drop-down menu. You can also assign a name and choose what traffic you wish to apply this to. To apply it to all traffic, simply select the checkbox to “Apply this profile to all traffic”. To apply it to specific traffic, click the ADD button below the expression box to create your own custom rules. For example, maybe you would want it to only filter traffic to the directory “/crm”.
You may create multiple expressions to filter traffic selectively as desired.
Once complete, click the save button. This activates the policy and you will return to the first window showing the policy and the priority. You may add multiple policies to enable multiple WAF Profiles created in the firewall tab, and to selectively apply them to different portions of your web application.