
Creating your first basic configuration to place a device behind the Total Uptime platform can be completed in 5 easy steps.
Step 1
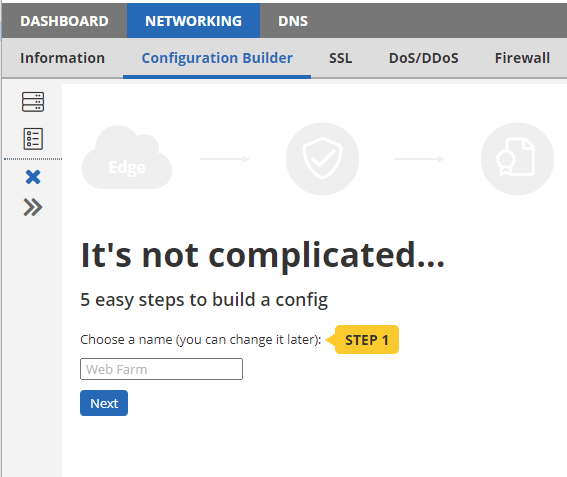
Log into the management panel and go to NETWORKING > CONFIGURATION BUILDER
On this page you will see a wizard that will walk you through an initial configuration. Step 1 requires the name for your configuration. Enter any name you like (e.g. Web Farm) and then click next, as shown below.
You can easily change the name later, so don’t worry about it too much.
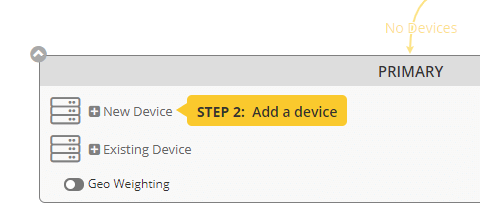
Step 2
Step 2 requires that you add a device by clicking the “New Device” button as shown in the screenshot below.
This is the “real” device (server) that we will route traffic to and protect behind the Total Uptime platform.
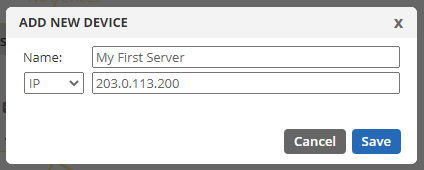
Give the device a name (which you can change later) and enter the IP address of the device (preferred). If it doesn’t have a static IP, you can enter the FQDN instead. Then click save.
Step 3
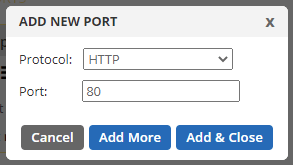
In this step we will add a public port by clicking the “New Port” button as shown in the screenshot below.
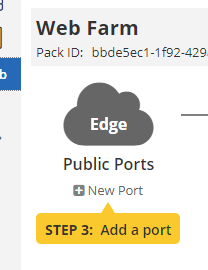
In our example, we will add protocol HTTP with port 80. After doing so, you can add another, or just click the Add & Close button.
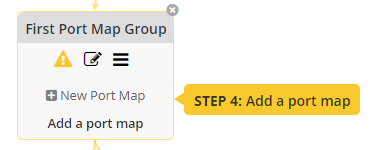
Step 4
Here we add a port mapping. Much like a firewall, we need to NAT the port from the public interface to the real device (back-end_. We will do this by clicking the “New Port Map” button as shown in the screenshot below.
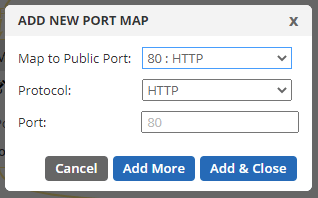
Complete the mapping. In my example, it suggests mapping my HTTP/80 over to HTTP/80 on the device, which we will do as shown in the screenshot below. When done, click “Add & Close”.
Step 5
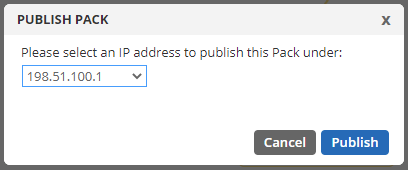
We’re almost done. We now need to make this configuration accessible on the internet. Click the “Publish” button as shown in the screenshot below.

This will prompt you to select an IP address from the drop-down menu. All trial accounts come with one IPv4 and one IPv6. Make your selection and click the “Publish” button as shown below.
You’re done!
Watch the banner at the top of the screen to know when the deployment across our network is complete. When it is, try putting the IP address in your browser to see if it produces any content from your device. If it is a basic web server like in our example, it should!
If it doesn’t, you may need to add additional ports, such as SSL_PROXY/443 to pass through encrypted traffic, like HTTPS.
If your device needs the http host header to be set, you may need to modify your Windows hosts file to trick your local machine into thinking that you’ve updated DNS.
Making Changes
If you need to make other changes, you can simply click the respective areas using the canvas to do so, as indicated below. Add more ports, port mappings or even more devices into a load balanced configuration.

Of course if you get stuck, don’t hesitate to reach out to us. The chat icon may be available in the lower-right of the panel, or you can always reach us by creating a support case too. We really are happy to help!