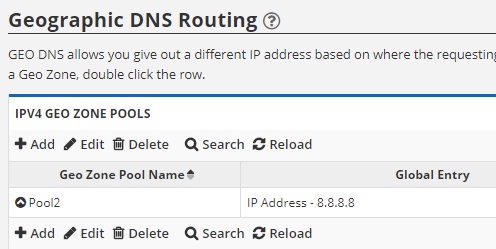
Geo Zones Tab

GEO Zones give you the ability to deliver different IP Addresses to visitors based on geography. For example, you may have servers in Europe and the United States. GEO Zones can let you direct the same host name of www.example.com to different locations. For a visitor in London, they can be given an IP address for your Europe servers. For a visitor in New York City, they can be given an IP address for your United States servers, all under the same A record. This allows you to directionally control traffic.
GEO Zones can be coupled with our Cloud Load Balancing solution to create a truly unique directional DNS service that can not only direct visitors based on geography, but also based on server load, performance and availability as well.
CREATING A GEOZONE POOL
To create a Geo Zone pool, click the Add button. A dialog box will pop up asking you to specify a name for your pool. This is for your reference only to make it easier to reference it later. Enter anything you like and click Save.
ADDING GEOZONE ENTRIES
To add entries to a Geo Zone Pool, click the arrow icon to the left of the pool name in the table. This will expand the pool and show a sub-table to add pool entries. Here you can click the Add button to add more entries, or select an existing entry and click Edit to make changes. Once you click add or edit, a dialog box will pop up requesting the following information:
- Server IP: Specify the IP Address of the server that will be delivered for the A record you will eventually assign this Geo Zone to.
- ALF Pac: This option only applies if you have our Cloud Acceleration, Load Balancing and Firewall Solution. It would allow you to assign a custom Server Group to a Geo Zone.
- Zone Name: This is the geography where you would like to have the IP Address delivered for the record you will eventually assign this Geo Zone to. For example, if you plan on assigning this Geo Zone to the A record of www.example.com later and want visitors in Europe to be given the IP Address of 1.1.1, visitors in North America the IP Address of 2.2.2.2 and the rest of the world the IP Address of 3.3.3.3, you would create four Geo Zone Entries as follows:
-
- 1.1.1.1 with zone name Europe
- 2.2.2.2 with zone name North America East
- 2.2.2.2 with zone name North America West
- 3.3.3.3 with zone name Global
- IMPORTANT: The Global Zone acts as a catch all for traffic not destined to the other zones and is required.
ASSIGNING A GEOZONE TO AN A RECORD
Once you have created your Geo Zone Pool, you can assign it to a DNS record. We only support IPv4 GEO DNS at this time, so they can only be assigned to A records. Simply go to the Domains tab, view the records for your domain, add or create the appropriate A record and instead of specifying an IP address for the domain, choose the Geo Zone from the drop-down menu. Within a matter of minutes, all of our global name servers will be populated with the IP specific to the geography/zone you have chosen.