IP Addresses Tab
This section allows you to view, buy, return and assign IPv4 and IPv6 addresses. This section will not be visible if you have not subscribed to a networking solution such as Cloud Acceleration, Load Balancing or Firewall. IP addresses are required for networking solutions because they act like a NAT or PAT firewall, passing traffic through to your real servers. An IP address is required to publish a Load Balancing Pack. NOTE: Additional costs may be incurred when buying additional IP addresses. The table will show any IP addresses you currently have assigned to your account.

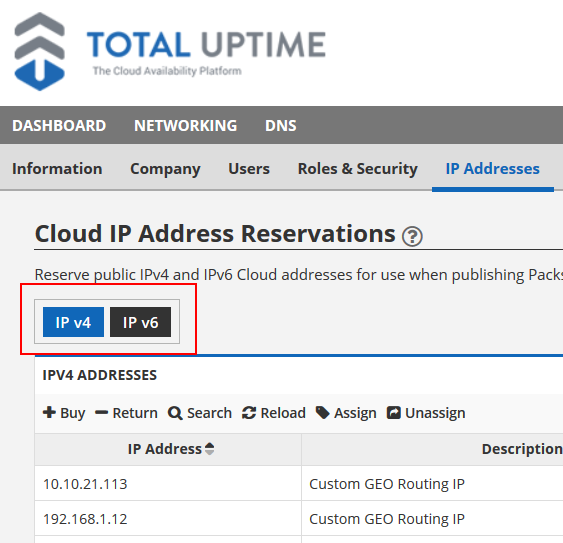
The table will display either IPv4 or IPv6 addresses depending on what you select here. To choose from IPv4 addresses, click the IPv4 icon (set to this by default). If you want to choose from IPv6 addresses, click the IPv6 icon. The current selection will be shown in blue. All actions will apply for the IP type you have selected, so if you want to Search for an IPv6 address you currently have reserved, you need to make sure you have IPv6 selected before you click “Search”. Other than this separation, the actions will behave identically for IPv4 and IPv6 addresses.
Buy: If you need an IP address, you can purchase one using the “Buy” icon. Simply select the “Buy” icon and you’ll be given a list of IP addresses (of the selected type) that you can choose from. Please note that you will not be charged for IP addresses unless you’ve exceeded the number of IPs included in your package.
Return: If you have an IP address that you no longer need, you can return this IP address by using the “Return” button. Simply select the IP address that you’d like to return and click the “Return” icon. Answer “Yes” to the verification prompt to complete the return.
Search: You can also search for an IP address that you currently own. You can search by any category listed in the IP Address table.
- Clear Filter: You can press the Clear Filter button at any time to clear your search filter and display all IPs.

Reload: Refreshes the screen.
Assign: If you have sub-accounts, you can assign IP addresses to them using this feature. First select the IP address you’d like to assign to one of your sub-accounts and click “Assign”. A box will appear asking which of your sub-accounts you’d like to sign the selected IP address to. After selecting the sub-company, click “OK” to verify your selection. A confirmation box will then appear telling you the action is complete.
IP Address table categories

IP Address: Displays the IP address.
Description: This shows which region the IP address belongs to.
Usage: Shows whether the IP is being used in a ALF pack, Global NAT Routing, etc.
Assigned To: Shows which company or sub-company the IP address is assigned to.