Setting up Single Sign-on (SSO) with Okta
Total Uptime now supports Single Sign-On (SSO) with Okta®. With SSO you can allow users to access the Total Uptime management panel using third-party accounts created with the Okta SSO IDP.
In order to begin using this functionality, some basic configuration is required. This document outlines the steps required for implementation.
In order or proceed with configuring login with SSO through Okta, you must:
- Have access to an Okta tenant
- Be an Okta administrator to that tenant
- Have a Total Uptime provisioned company account
- Have full administrative rights to the Total Uptime company account
Okta Configuration Steps
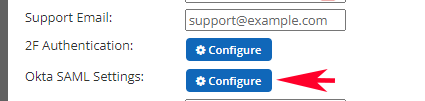
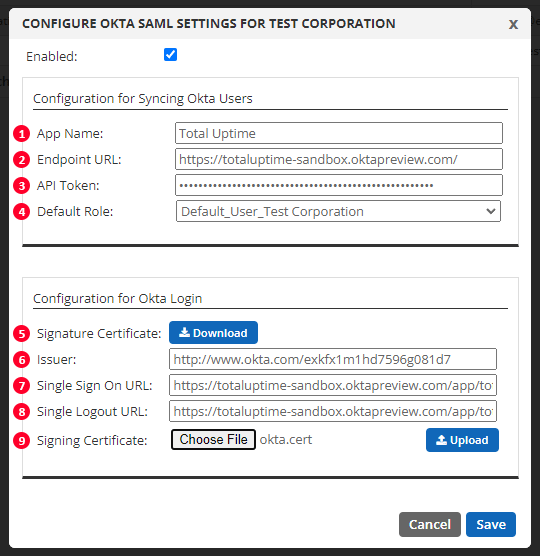
Okta configuration settings are found in the Company tab in the management panel at https://manage.totaluptime.com. To find these settings, log in with your existing admin credentials and then proceed to the gear icon in the upper right corner. Select the COMPANY tab, select your company in the table, and then choose the edit button on the toolbar. Near the bottom of the company edit dialog you will find where to configure the Okta SAML Settings as shown in this partial screen capture below:
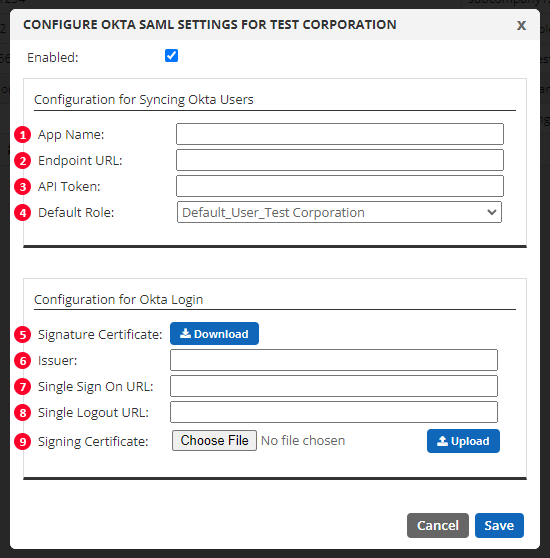
To view the configuration settings, check to enable it. There are nine requirements to complete Okta integration. We will cover all of these points in greater detail in this KB article.
Creating a new Application in Okta
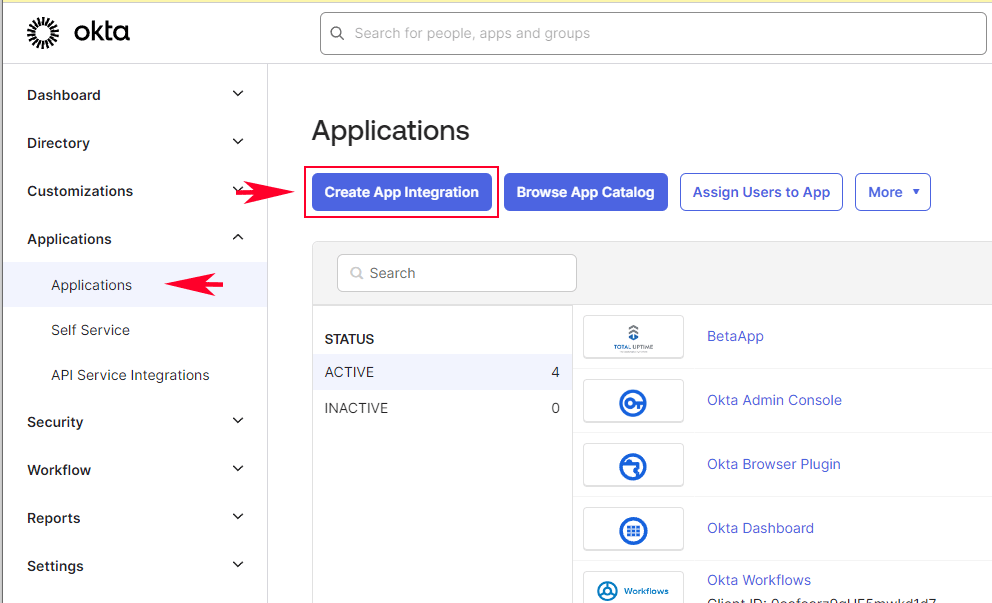
To create a new Okta Application for the Total Uptime management panel, an Okta user with Admin rights must login to your Okta tenant. Then click the button to “Create New App Integration” located under the Applications menu as shown below.
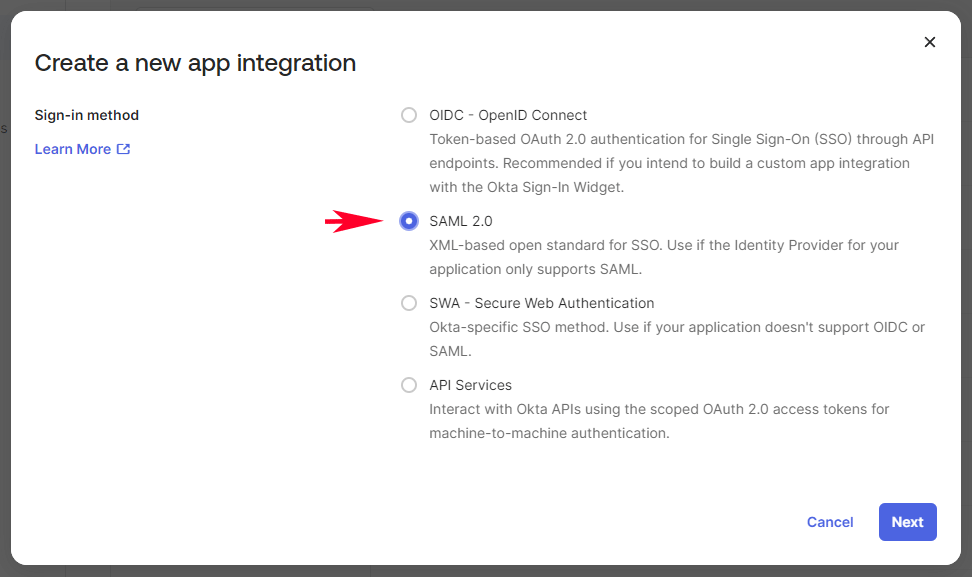
Then choose SAML 2.0 for the app integration type as shown below:
Next, it is a simple three step process to create the SAML App Integration.
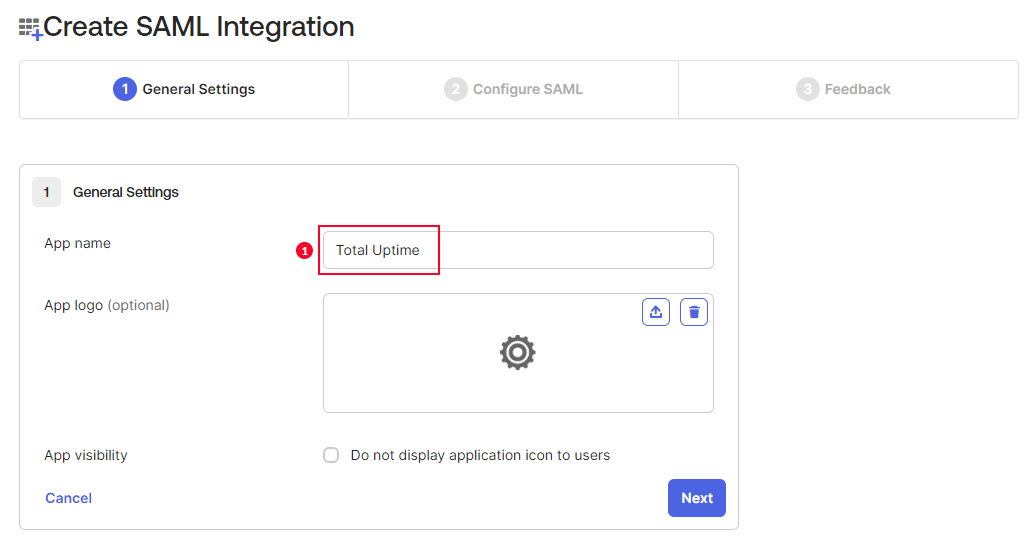
First, provide the App name and upload your company logo. You may wish to call it “Total Uptime”, but whatever you choose, it must be copied exactly to the Okta Configuration Settings into the field noted with (1).
For requirement (2) in the configuration dialog at Total Uptime, the Endpoint URL, you will use your unique Okta URL. (In our examples here we use https://totaluptime-sandbox.oktapreview.com but of course you should use your own.)
In the next Okta app configuration step, you will need to complete the first fields as follows (you can copy these):
- Single sign-on URL – copy and paste:
https://manage.totaluptime.com/SAML/AssertionConsumerService.aspx - Audience URI (SP Entity ID) – copy and paste:
https://manage.totaluptime.com/
NOTE: For the “Application username”, Total Uptime’s username is an email, and if that is your default method in Okta, then the selection of Okta username is just fine. Otherwise choose email.
Next, from the Total Uptime okta config dialog, using the blue button in requirement 5, download the Signature Certificate. The file is named sso-totaluptime.cer.

Now, back in Okta, click on the blue link in the bottom-right corner in Okta called “Show Advanced Settings”. There you will find a few more options. Upload the sso-Total Uptime.cer file as Signature Certificate.
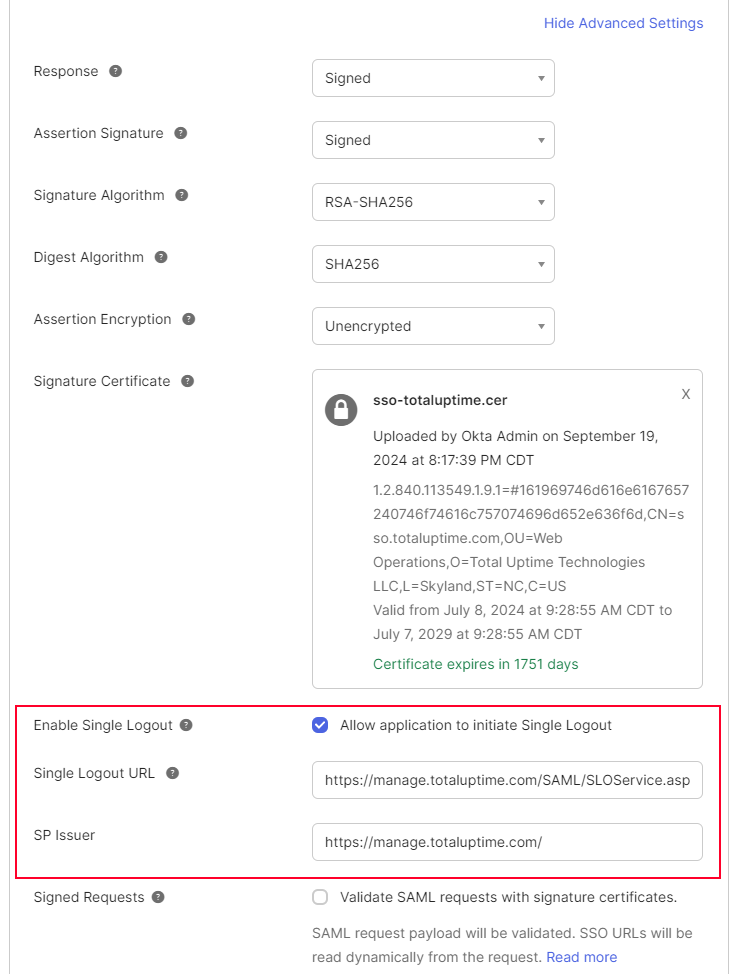
After uploading our certificate, you will see the Signature Blueprint and the following 3 options:
- Enable Single Logout – Checked to enable it
- Single Logout URL – copy and paste:
https://manage.totaluptime.com/SAML/SLOService.aspx - SP Issuer – copy and paste:
https://manage.totaluptime.com/
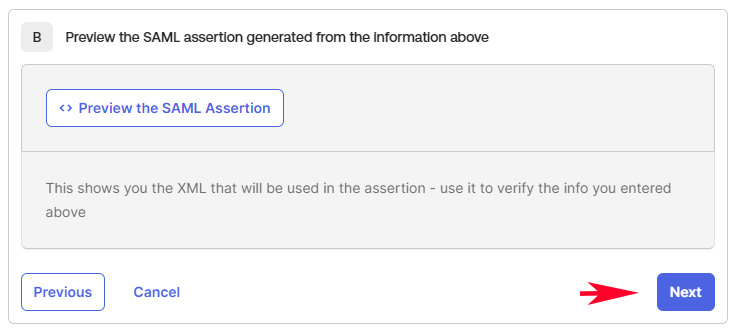
Now scroll down to the very bottom of that dialog and click on Next.
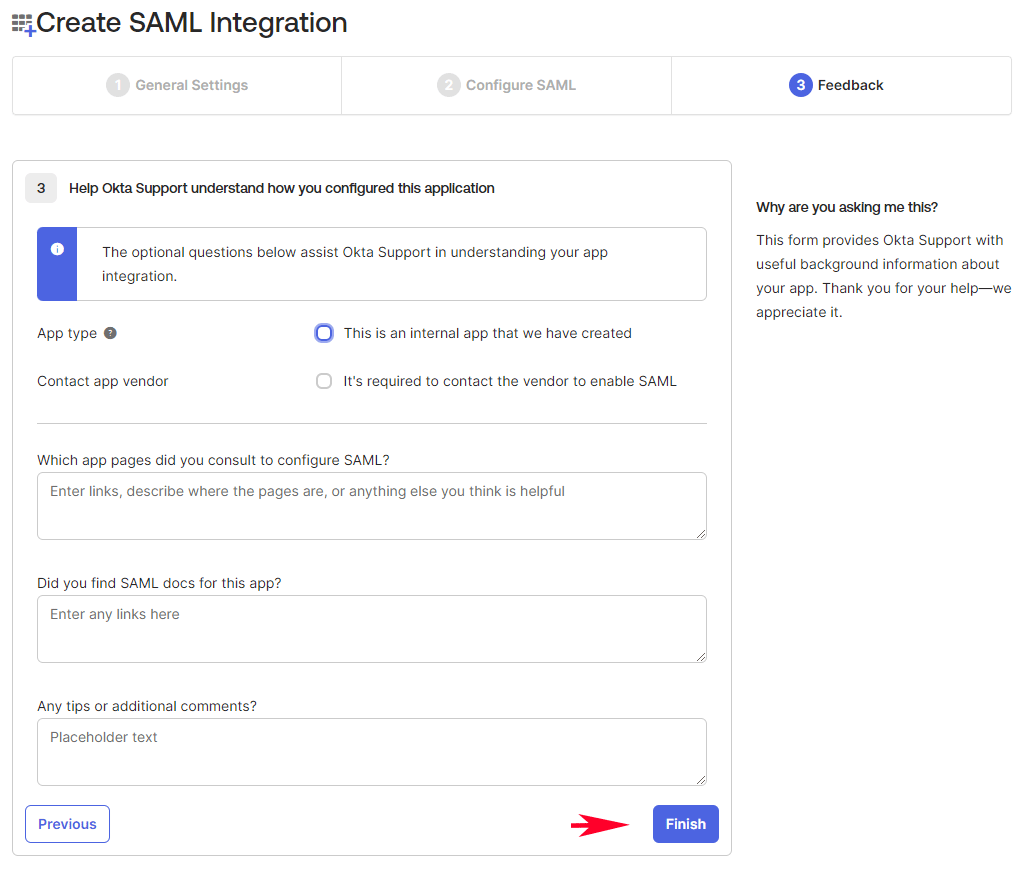
On the last step for “Feedback”, choose the desired option and click on the Finish button at the bottom.
Now, your “Total Uptime” Okta SAML 2.0 Application has been successfully created and you will see the summary page similar to our example below.
In the bottom right corner you will see a button labeled “View SAML setup instructions”, click there.
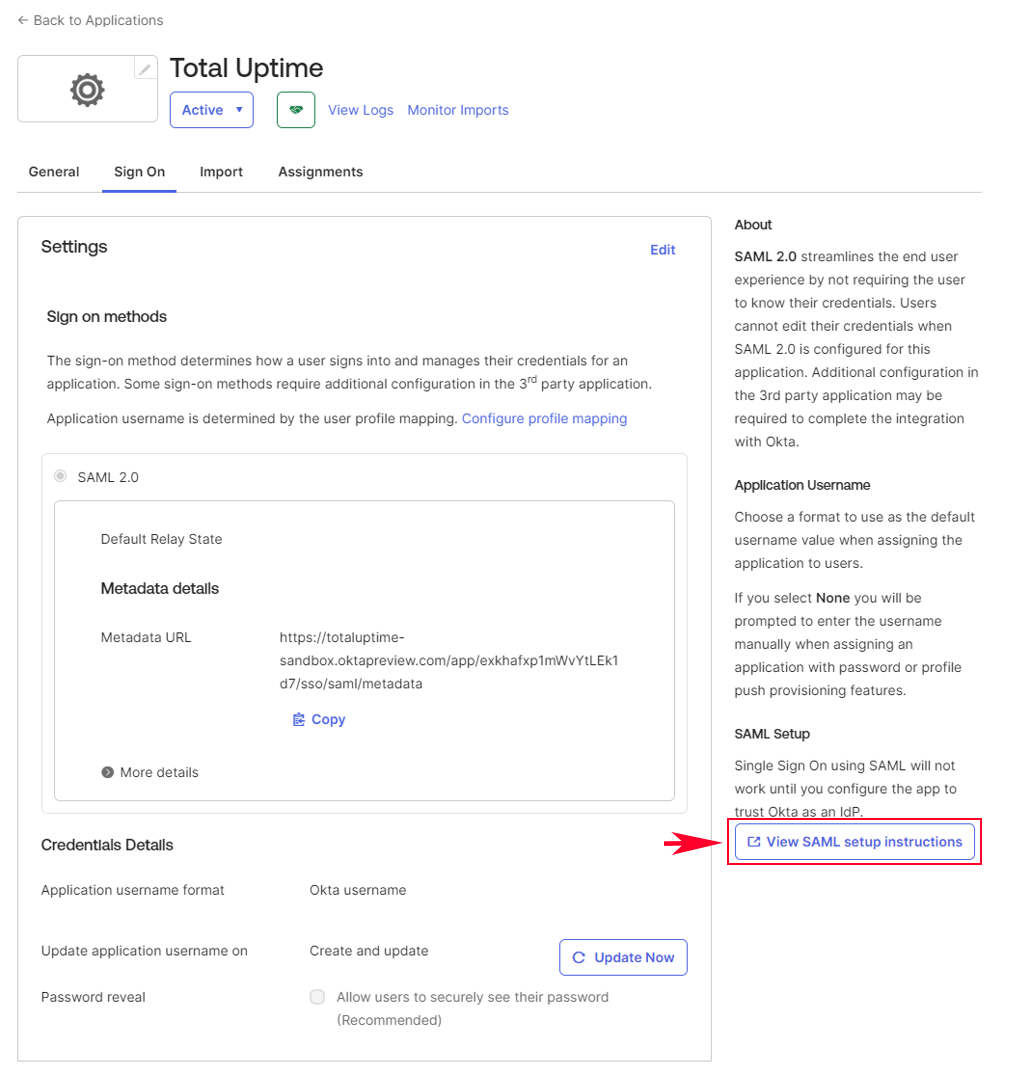
This will open a new browser tab displaying essential items needed to complete the config in the Total Uptime panel for requirements 6, 7, 8 and the certificate.
NOTE: The URLs seen below are for our demo implementation. Please use the ones provided for your application by Okta and not ours below!

In our case we can copy the following from the above screen (your info will be different!):
- Issuer –
copy and paste from Okta - Single Sign On URL –
copy and paste from Okta - Single Logout URL –
copy and paste from Okta - Download the X.509 Certificate and upload it to the Total Uptime panel as Singing Certificate (9th requirement).
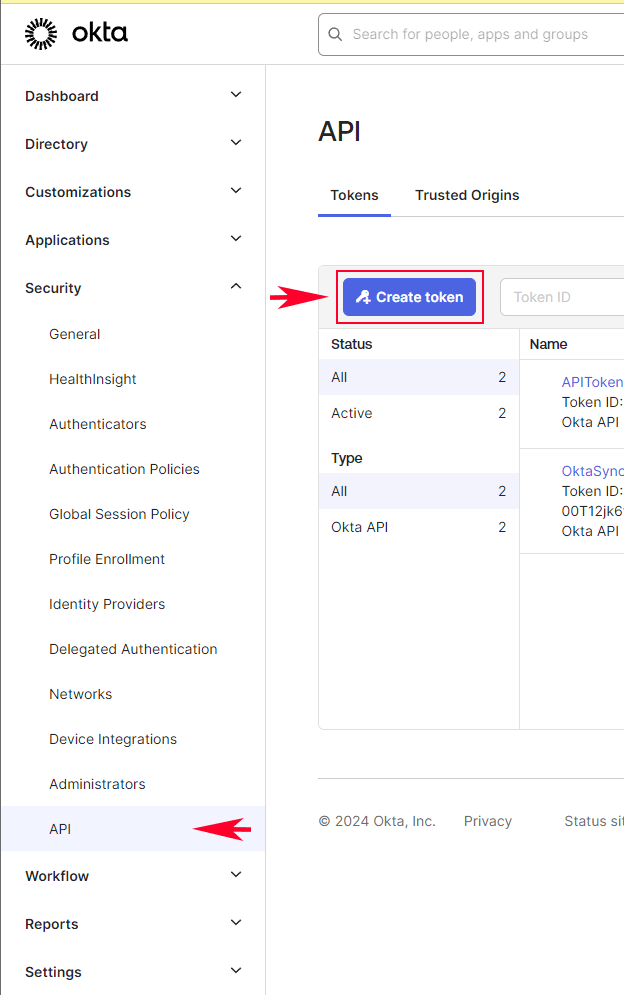
Create an Okta API Token
Finally, you need to create an Okta API Token to allow Total Uptime to connect to your Okta Tenant. This will allow us to sync people permitted in this app integration.
To do that, navigate to the Security > API section and click the button to Create Token.
Give your token a name that indicates that it has been assigned for Total Uptime integration…
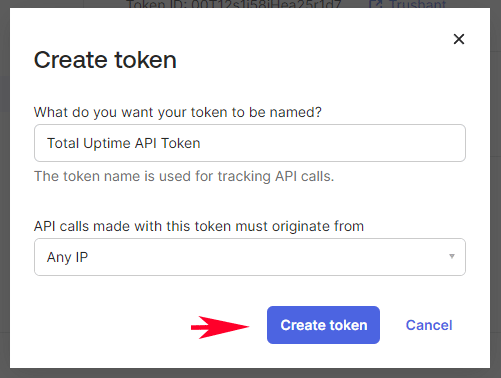
Here we’ve specified that “Any IP” can use this token, but if you wish to restrict it to certain IPs, contact us for further information.
Now click Create Token.
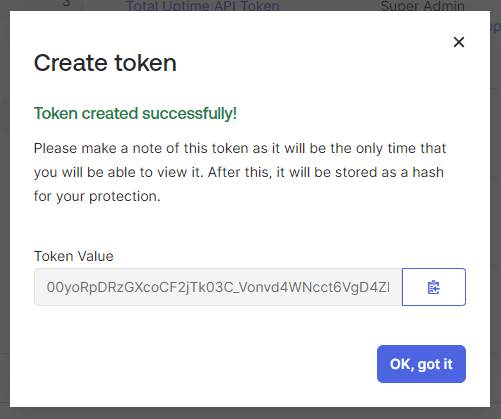
Use the copy button beside the Token Value and paste it into the 3rd requirement in the Total Uptime Okta configuration.
When everything has been configured, your Okta settings should look similar to our example below.
NOTE: Remember, several of the values below are just an example.
Click save to complete this part of the configuration.
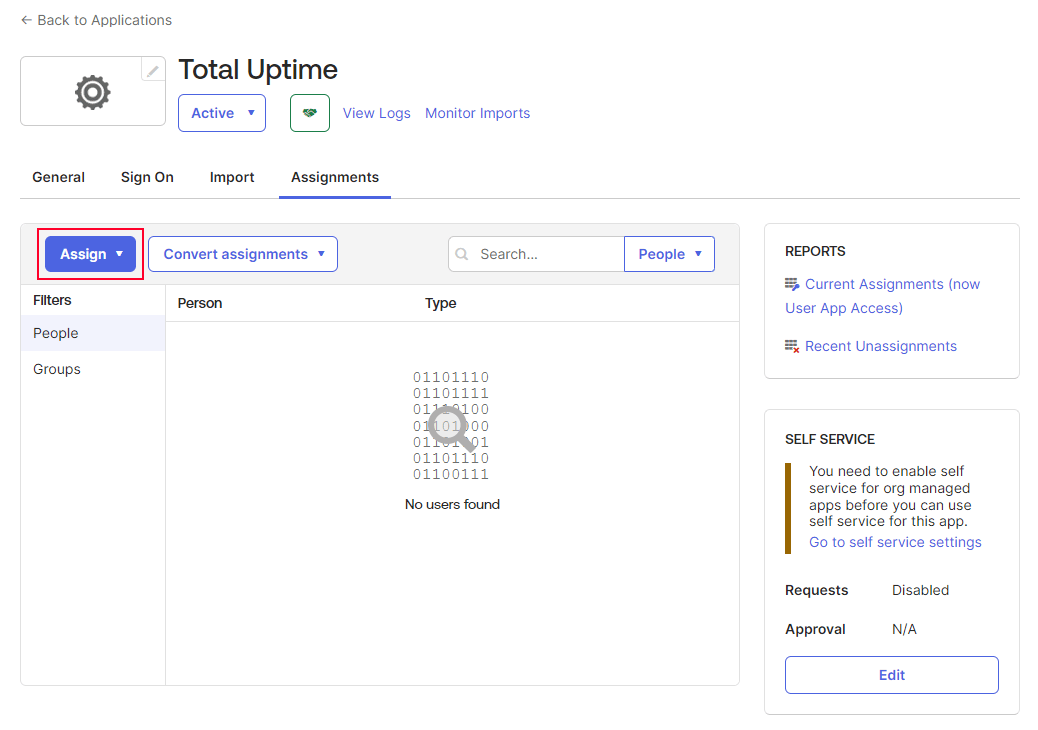
Assigning Okta Users to the Total Uptime Application
Now you will need to assign Okta users (people) to access the Total Uptime application in order for them to be able to log in. In Okta, click on the Assignments tab and then the Assign button, it will show list of users and then you can assign them as needed.
NOTE: Only the users assigned to this Total Uptime app will be considered during the synchronization process. If you remove (or unassign) any user from this application then that user will be removed from Total Uptime during the next sync interval (generally within a few minutes). The entire process of adding and deleting users will now be fully controlled in Okta.
Configuration for Syncing Okta Users
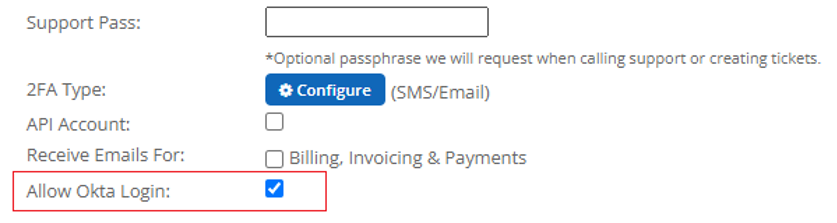
After configuration, any people you have assigned to the Total Uptime Okta app will automatically sync to our application every few minutes and those users will be able to login using Okta. Any user accounts that you may already have in the panel will NOT sync with Okta upon configuration (this is based on the email). If you want to convert an existing user to allow them the ability to log on using Okta, you must select the “Allow Okta Login” in their Total Uptime user profile and allow a few minutes for the user to sync.
Likewise, if you would like a non-Okta user, you can create it in the panel and ensure the “Allow Okta Login” is not checked. This may be desirable for a “Break Glass” user account to use in the event Okta is down.
Users that are created through the synchronization process will be created with the role you have specified, so it is important to choose something appropriate for all users by default. You can always change their role assignment later from the Edit User dialog, but we caution against using an admin role as default, unless of course you will only ever add admin users to your Okta app.
To remove users, you must unassign them in the Okta app integration. Deleting them from the Total Uptime management panel will not result in permanent deletion since any user in Okta will be synced and recreated after a short while.
Testing the Login Process
Now your users can go to https://manage.totaluptime.com to log in. After they enter their email address, the application will detect that Okta is enabled for the domain and will redirect to Okta to complete verification and log in.
Final words
Don’t forget that any users created by automatic synchronization (from those you’ve assigned in your Okta tenant) will be created with the default role you specified here. If the default role has no permissions, you’ll want to adjust that for each user that has been synced.
Should you require any assistance, we’re here to help as always. Just create a support case at https://support.totaluptime.com or reach out to us via chat or phone.