Zone Transfers
By default, no DNS servers other than those controlled by Total Uptime are allowed to perform a Zone Transfer (AXFR or IXFR). This is the recommended best practice and ensures the security of your zone by preventing someone from retrieving an entire copy containing all of your resource records with a simple AXFR request.
The Zone Transfers tab allows you to configure groups of IP addresses belonging to servers that are permitted to make AXFR requests. Think of it as an Access Control List (ACL), if you will. You can configure a single IP, a range of IPs or specific prefixes using CIDR notation. You then attach this list to specific Zone(s) on the domains tab, and when complete, any DNS server(s) behind the IP addresses you have listed will be permitted to make a zone transfer request.
Creating a Zone Transfer Group
When you first land on the Zone Transfers tab, because no Zone Transfer groups exist, you will see something similar to what is shown below.
![]()
To create your first group, click on the “Add a Group” button. When you do, the following dialog box will open requesting a name for your group:
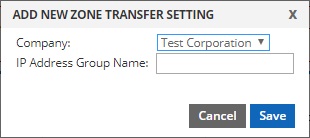
The group name is strictly for your reference. Name it anything you wish, and click submit. For example, we’ll name our group “Corporate Name Servers” because we want to give our internal Name Servers the ability to pull a copy of our zone.
When added, you will then see your new group appear in a table, such as the one depicted below.

Now that your group is created, you need to add IP addresses to it. To do so, click on the black arrow icon to the left of the row you wish to edit. You can alternatively select the row once (in which case it will turn blue) and then click the “Edit” button on the toolbar. You can also double click the row. You will then see a second table within your group, like the one shown below:
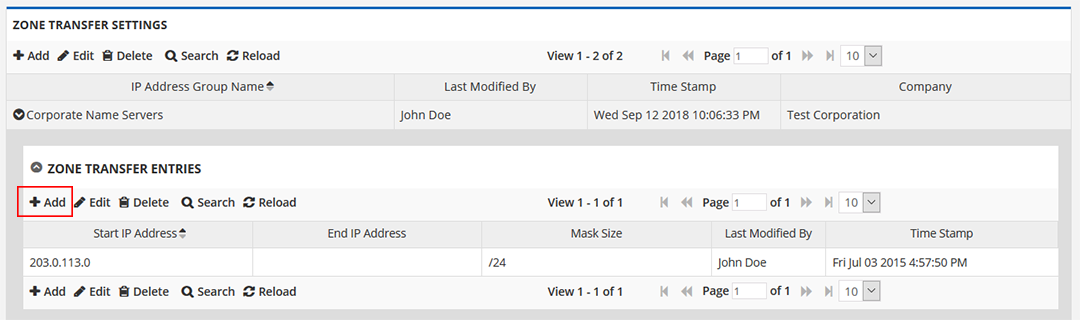
To add your first IP address to the new group, click the ADD button from the toolbar as shown above. This will open up the IP address add dialog box, like the one shown below:
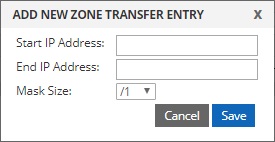
This dialog will allow you to add a single IP address, a range of IP addresses, or those within an entire subnet.
For example, to simply enter one IP address such as 203.0.113.50, you would enter this IP in the “Start IP Address” box as well as the “End IP Address” box leaving the Mask Size alone since it is not required. In fact, the “Mask Size” box will become inactive when you enter the IP into the End IP Address box, confirming that it is not needed.
As another example, to enter a range of IP addresses such as 203.0.113.1 to 203.0.113.254 you would enter 203.0.113.1 into the “Start IP Address” box and 203.0.113.254 into the “End IP Address” box, again leaving the Mask Size untouched.
Lastly, you can also enter complete ranges of IP addresses. For example, if you wish to enter the same range we outlined above but using a mask (CIDR notation) such as 203.0.113.0/24 you would enter 203.0.113.0 into the “Start IP Address” box but then you would leave the “End IP Address” box empty and choose “/24” from the “Mask Size” select menu.\
Once you have added your range or subnet mask, click the Submit button to save it to your list. Add additional IP addresses, ranges or subnets to your list as needed. Each list can support up to 128 entries.
NOTE: At the moment, Zone Transfer Groups do not accept IPv6 addresses. These will be permitted in the near future.
Attaching your Zone Transfer Group to a zone
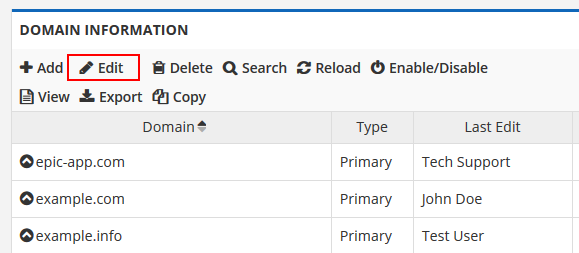
Once you have created your Zone Transfer Group, you must then assign it to one or more Zones (domain names) for use. Until you do so, they will not be utilized. To do this, Go to the DOMAINS tab and then select (not double click) a zone within the table so it turns blue. Then click the EDIT from the toolbar as shown below:
When you click the edit button, the following dialog-box will open:
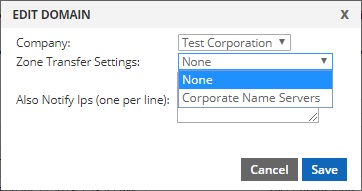
Now you can choose the list you just created from the “Zone Transfer Settings” select menu as shown above. Once chosen, click the Save button to update your zone. You will now be returned to the table view of your domains, and you should see your zone transfer group appear in the table as shown below.

Last Step: Configure your DNS server
Whether you wanted your own DNS server to replicate the zone or if you want another DNS provider to replicate the zone, you still have one last step. You must configure that server with the same zone as “secondary” and to pull it from our name servers. We cannot outline the steps to complete that process here since every DNS server and provider is different. But they will need two essential pieces of information. The first is the name of the zone, and the second is where to transfer the zone from. The zone should be transferred from our servers at 162.252.215.21 and if a second IP is supported, also 162.252.215.22.