
Here is a summary of the steps required to change your name servers at GoDaddy to our name servers.
- Log into your Godaddy account.
- From the top menu select “Domains” and choose “All Domains” as shown below:

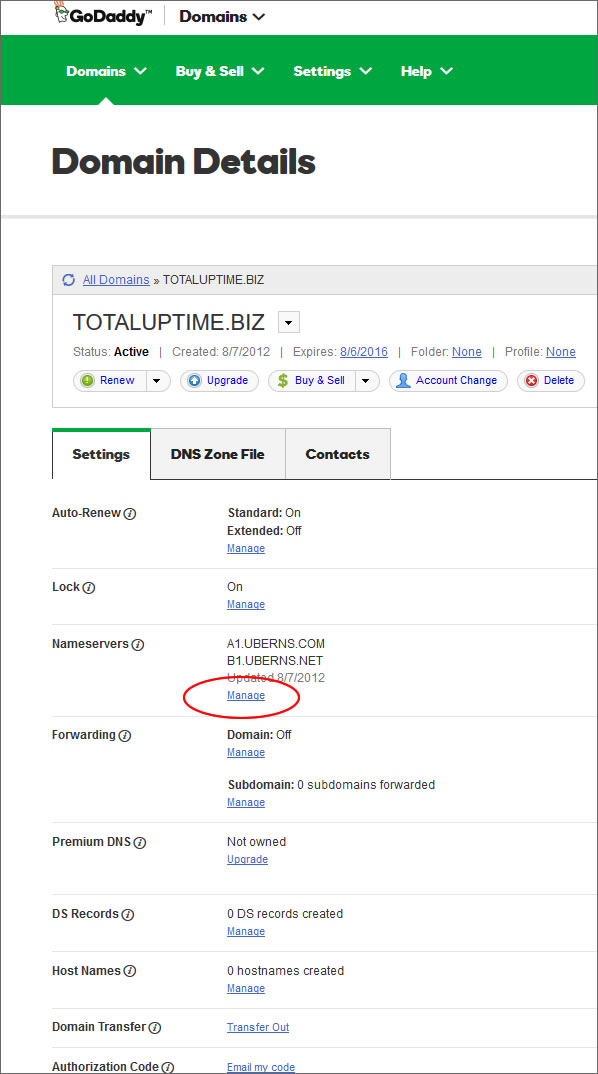
- On the page that opens next, you will see all of your domains in a table list, each hyperlinked in blue. Click on the domain you wish to make the name server change to. This will open another page which defaults to the SETTINGS tab. On the left side of the screen you will see the word “Nameservers” in a bold type. To the right of that it will list your current name servers and the last time you changed them. Below that, click the “Manage” hyperlink that is in blue (see the screen capture below).
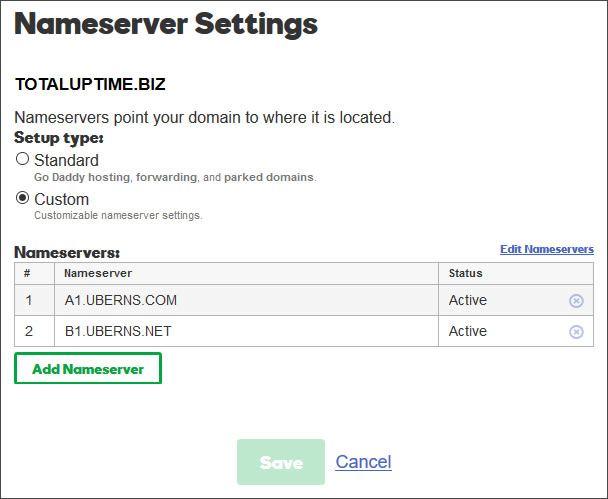
- On the pop-up box that opens, you must choose the “Custom” radio button if it is not already selected. This will allow you to specify your own name servers.
- Click the “Add Nameserver” button and enter our name servers ensuring that you completely replace any name servers that are already there, or if you can’t replace them, you can then click the blue circle X icon to delete them. You can find the name servers you should use on the lower-right side of the DOMAINS tab while you’re logged into the manage.totaluptime.com portal.
- Click SAVE and you’re done! Within 30 to 120 minutes the change should be reflected on the Internet, and DNS traffic will route to our nameservers.
If you have any questions, we’re happy to help! Just submit a support case any time of the day or night.