NOTE: This article covers obtaining the original client IP for logging purposes. If you need to obtain it for use in your code, check out this article.
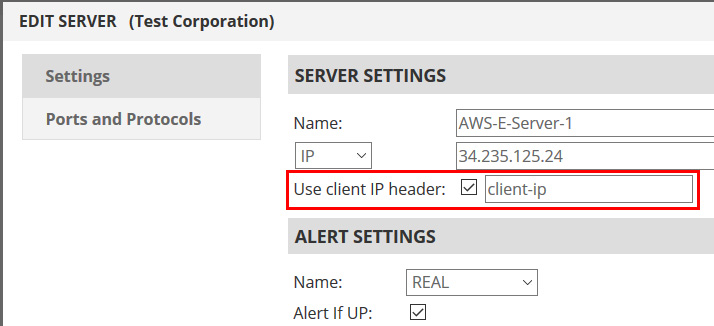
IMPORTANT! Before implementing the steps below, we’ll assume you’ve enabled the “client-ip” header pass-through. To do so, log into the management portal and edit your server(s). In the settings dialog you will see the “Use Client IP header” option. Enable it and then specify a header name. “client-ip” is our recommendation, but it can be most anything you desire. In our examples, we will use “client-ip”.
This article contains information about configuring the Client IP address for log files on an IIS 7.0 or IIS 7.5 server that is behind the Cloud Load Balancer. Also refer to this KB article for information about this design and why the client IP is not passed through by default. If you just want to get the client IP for use in your code. See this article.
Requirements:
The following are the basic requirements to complete this task:
- IIS 7.0 or IIS 7.5 installed on Windows 2008 or Windows 2008 R2
- IIS Management Console must be installed to manage the IIS Advanced Logging feature
- You can use the Windows installer files for 32-bit and 64-bit versions of the installed operating system
- Configure the Cloud Load Balancer (as shown above) to insert the client IP header
Configuring the Client IP Address Logging on an IIS 7.0 or IIS 7.5 server that is behind the Cloud Load Balancer.
To configure client IP address logging on an IIS 7.0 or 7.5 server behind the cloud load balancer, complete the following procedure:
- Download and install the advanced logging feature for IIS 7.0 and 7.5 from Microsoft
IIS Advanced Logging – 32 bit
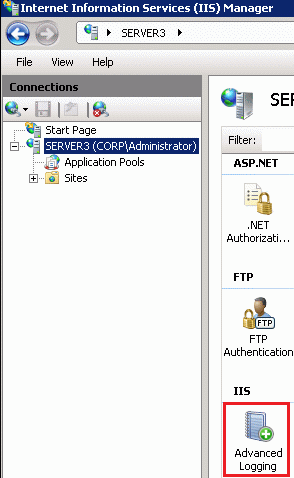
IIS Advanced Logging – 64 bit - After installation, open IIS Manager and click on Advanced Logging, as shown in the following screen shot:
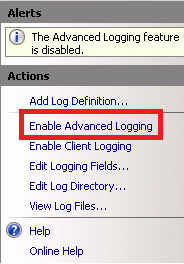
- Click on the Enable Advanced Logging link:
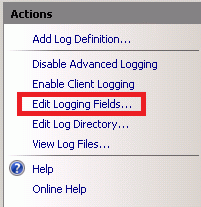
- Click on the Edit Logging Fields link:
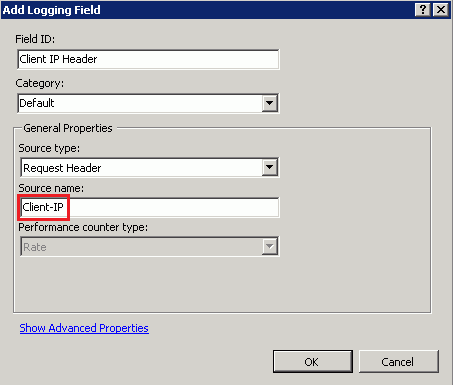
- Click Add Field to add a new Logging Field:

- Type the details as shown in the following screen shot (NOTE: the source name field should be the same as the Client IP header field you created in the Cloud Load Balancer (depicted at the very top of this article).
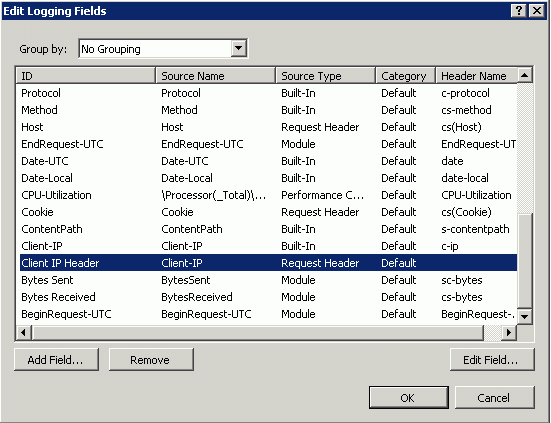
- Click OK, then scroll down and verify that the new Logging Field is listed as shown in the following screen shot:
- Click on the Add Log Definition link, as shown in the following screen shot:
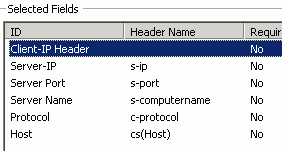
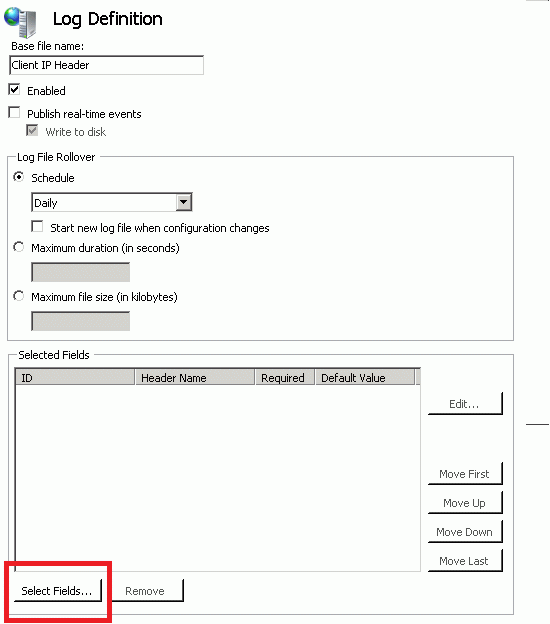
- Type Base file name in the Log Definition and click Select Fields:
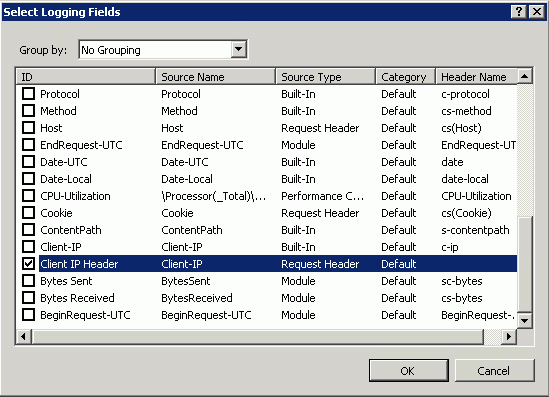
- Select the Client IP Header Logging Field that you created
- Click on the Apply or OK button:
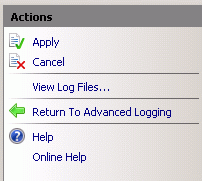
- Click on the Return to Advanced Logging link:
- The Client-IP Header Log Definition should now be listed as shown in the following screen shot:

- Select View Log Files. The advanced logs should now be available in the default location:

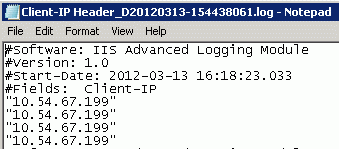
- Open the log file to view the Client IP address logging:
To log additional fields, you can add more fields above in step 10