
Here are step-by-step instructions for creating a Company within/under your company. Often called multi-tenant, this can be a sub-company for a client, a department or division that needs to manage their own account, a way to delegate domain management to someone else, or just a way of keeping things locked down for security purposes.
-
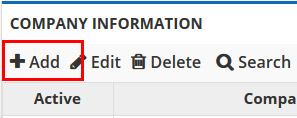
- After logging into the portal at https://manage.totaluptime.com (or your own branded URL) Go to the ACCOUNT tab in the upper right corner, and then choose the COMPANY sub-tab.
- If you have the ability to add new sub-companies, the + Add button will be visible. If it is not visible, your account does not currently support this. Please email us if this is the case. It might be something we can enable on your account.
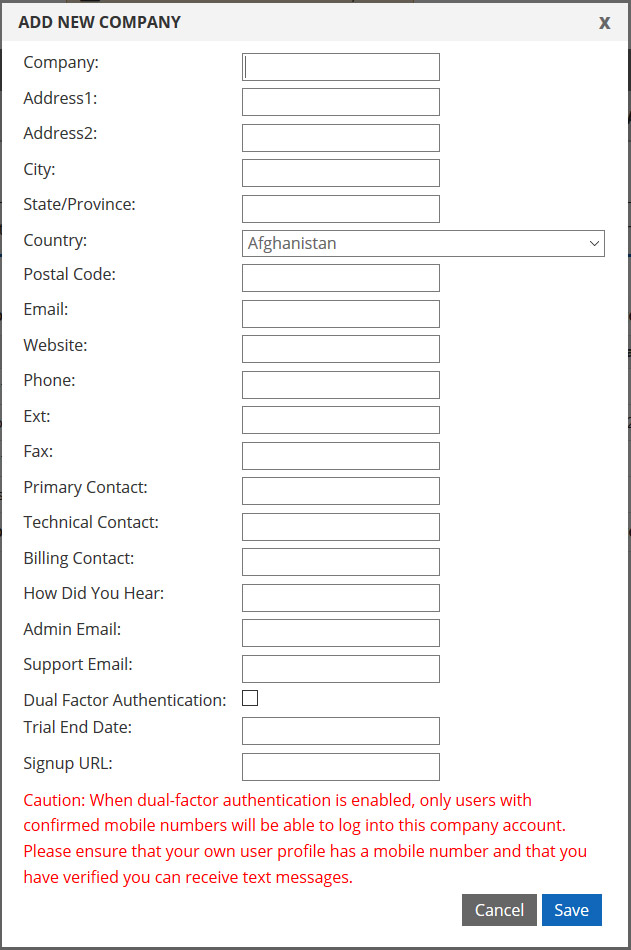
- Complete the dialog box that pops-up with information about the Company. Note several required items (depicted in red below), including the Primary Contact and Admin email. These must be unique and for the individual at that company you will be creating the very first user account for, even if you have no intention of giving them login access. Don’t worry, we will not use any of this information to contact your customers. By default, sub-companies are not on any email lists.
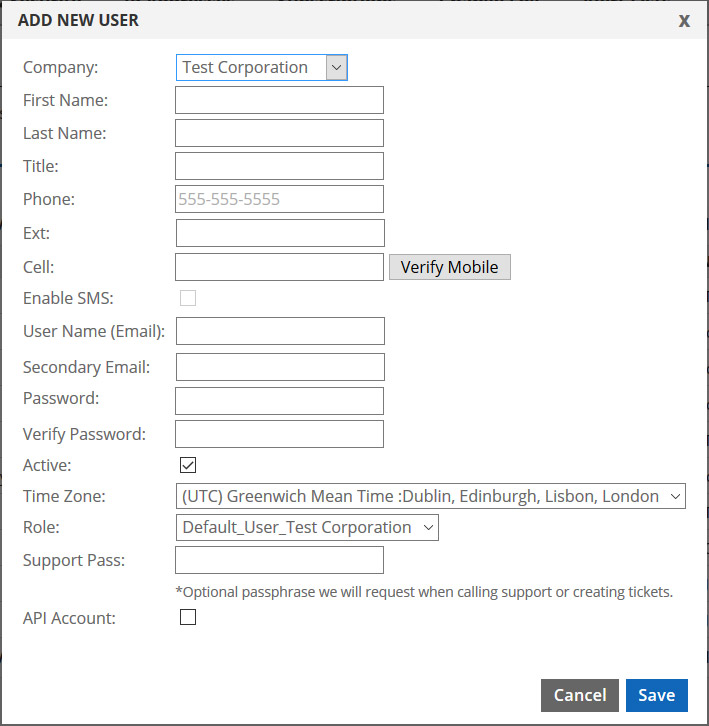
- Click SUBMIT, and on the second dialog you will complete creating the first user account. Most of the information is pre-populated, so simply enter a secondary email (which can be the same as the primary), and a secure password 2 times. Check the Active box, and click Create User. This will NOT send any emails to anyone. The onus is on you to alert your customer about the new account, and only if you want to.
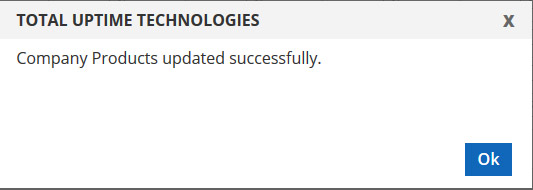
- Now choose the product options you wish to give to this sub-company and click SAVE. If your reseller account does not have access to a product, you will receive an error when you save.

You should receive a success dialog box!
- By default, the user you created will be dropped into an ADMIN role for that company, which has full access to the products you selected for them. You can adjust the roles by going to the Roles & Security tab.

- Should you wish to add additional users for your new sub-company, simply go to the USERS tab and create them ensuring that the right sub-company is assigned. By default, when you create a new user, it is dropped into a default role for that company, which has no permissions unless you adjust the role. So you may wish to re-edit the user to change their role to the ADMIN role, or adjust the default role permissions.
If you require any assistance, just submit a ticket. We’re here to support you 24x7x365!