
There are times when your website must be taken down for routine maintenance or, in the event of a catastrophic failure of all your servers, must be restored from backup. In either event, a maintenance page is necessary to inform your customers of the reason the site is down and when you expect it to come back online. A good practice is to keep a maintenance page on a small Linux VM (Digital Ocean, AWS, Azure, etc.) which can be failed over to when the main site is down.
This article provides instructions for installing and configuring the Apache web server on an Ubuntu server to serve your maintenance page. The version of Ubuntu Server used in this article is 14.04, but it should be quite similar for other versions.
Install the Apache web server
Once you have selected a VM provider, turned up a VM, and gotten Ubuntu Server installed, you are ready to install the Apache web server by following these steps.
STEP 1: Log in with the user account which was created during the OS install.
STEP 2: Update the Apt package manager
![]()
NOTE: You will be asked to enter your user account password because you are using the sudo command which runs as the root user.
STEP 3: Install Apache
![]()
You will be asked to confirm you wish to install the package. Type ‘y’ and press ‘enter.’
STEP 4: Confirm Apache is installed and running correctly by opening a browser and visiting your VM’s IP address.
The top of the page should look like the following:

Configure the maintenance page
Now that the Apache web server is installed and confirmed to be working it is time to create a maintenance page and upload it to the default directory /var/www/html.
The point of a maintenance page is to inform your visitors the site is down but will be back online in the near future. Be sure to provide a simple message explaining the reason for the downtime as well as an estimate as to when the site will be back online. It is also a good practice to make the page match your website in style (i.e. colors, fonts, and background).
We will be using a very simple maintenance page in this example.
STEP 1: Create a file named index.html
The Apache web server comes with a default index.html file located at /var/www/html. We will be replacing it with a file of the same name.
First, we need to change the name of the current file.
![]()
NOTE: this will rename the file as index.html.orig and move it to your user home directory
Next, create a new file at /var/www/html.
![]()
STEP 2: Edit the index.html file
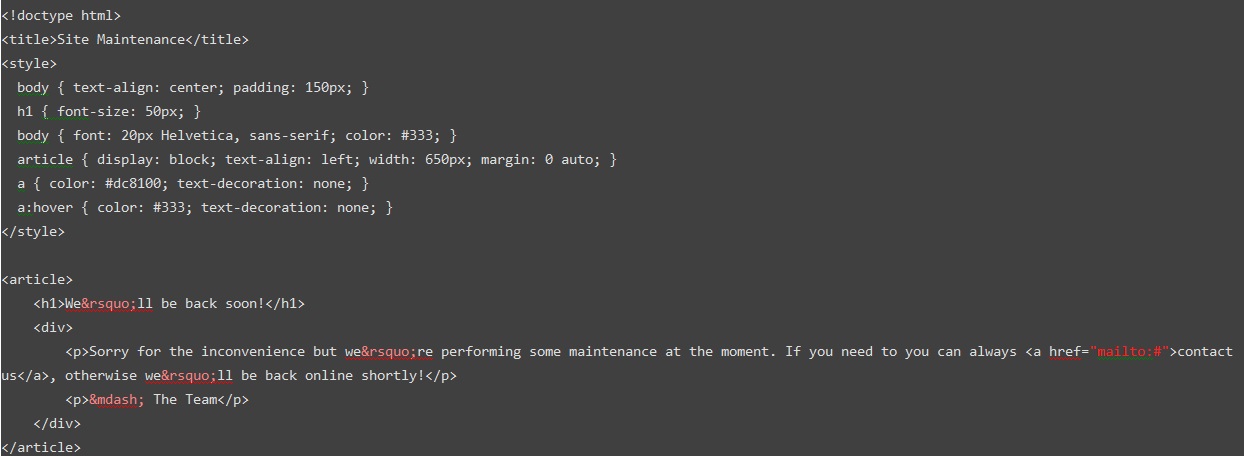
Edit the new file and add your maintenance page code.
![]()
Our sample file uses the following code:
NOTE: If you’d rather create the index.html somewhere besides the Ubuntu CLI you can copy it to the server by doing the following:
Install SSH server on the Ubuntu server:
![]()
Using an FTP client (Filezilla in our example) connect to the server using the IP address, username, password, and port 22:

Copy over your index.html file. The default location for the FTP directory will by your user’s home directory.
Log into the server with the same user account you used to upload the file via FTP and use the following command to copy the file to the default site directory:
![]()
STEP 3: Confirm the Apache web server is serving the correct file.
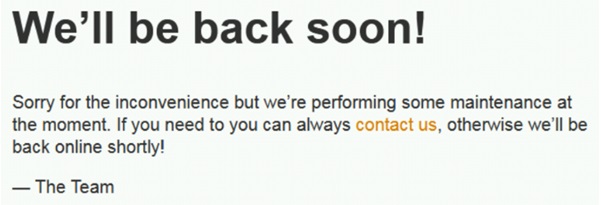
Open a web browser and enter the IP address of your Ubuntu server in the address bar, then press ‘enter.’ What should be displayed is your maintenance page. If you used the code example from step 2 you should see the following:
Optional: Return 503 status code
The above documented process will return an HTTP status code of ‘200 OK.’ For SEO purposes you may wish to configure the web server to return an HTTP status code of ‘503 Service Unavailable’ so search engine crawlers know to check back at a later time. This way your website ranking will not take a hit while the site is down.
The below instructions will help you get the Apache web server configured to return a ‘503 Service Unavailable’ status for all incoming requests.
STEP 1: Configure the Apache web server
After installing Apache per the instructions above we will need to configure the default configuration file (/etc/apache2/apache2.conf) to allow a .htaccess file located in the default site’s root directory to override settings and use mod_rewrite to return the 503 status.
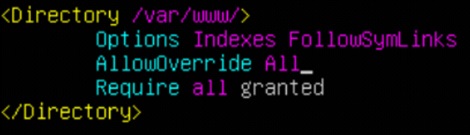
Edit /etc/apache2/apache2.conf
![]()
Find the code block beginning with <Directory /var/www/> and change the ‘AllowOverride None’ line to ‘AllowOverride All.’
STEP 2: Create and edit the .htaccess file
Navigate to the default site’s root directory.
![]()
Create the .htaccess file.
![]()
In our example we will be using Apache’s mod_rewrite in the .htaccess file to rewrite all web requests to a file (/var/www/html/maintenance.html).
Edit the .htaccess file.
![]()
Add the following to the file:

The above code takes all web requests, and as long as the redirect status is not 503, the server will return the 503 status and redirect the traffic to /var/www/html/maintenance.html.
STEP 3: Create the maintenance.html file
![]()
STEP 4: Add HTML code to the maintenance.html file
Follow the earlier instructions of editing the index.html file. Simply substitute maintenance.html in place of index.html.
STEP 5: Ensure mod_rewrite is enabled
![]()
Restart Apache
![]()
Test to ensure mod_rewrite is enabled
![]()
You should see the following in the output:
![]()
STEP 6: Test
Open a browser and enter the IP address of the Ubuntu server in the address bar, then press ‘enter.’ You should see the maintenance page. Testing with the IP address followed by a ‘/’ and any characters should also bring you to the maintenance page.

To test for the 503 status code, open up developer tools in your browser (CTRL+Shift+I in Chrome and Firefox) and select the network tab, then reload the page. You should see the 503 status as shown below.
Conclusion
You should now have an Ubuntu server configured with the Apache web server serving up your maintenance page. Using this in combination with DNS failover or Cloud Load Balancing will automate the process of web traffic getting sent to your maintenance page in the event your other web servers fail.