
If your domain registrar is name.com, here are the steps required to change your name servers to Total Uptime’s.
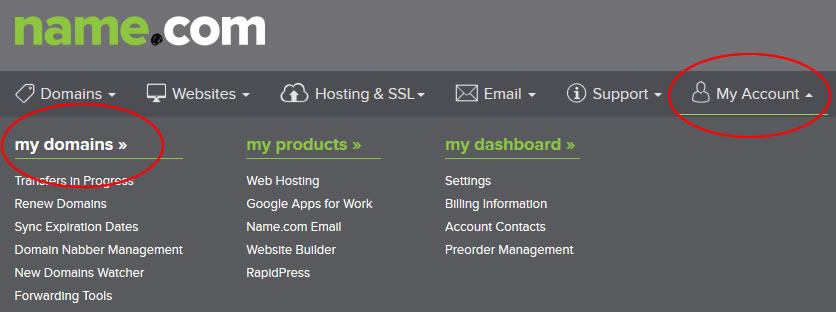
First, log into your name.com account. Then from the top navigation menu, select MY ACCOUNT and then MY DOMAINS as shown in the image below:
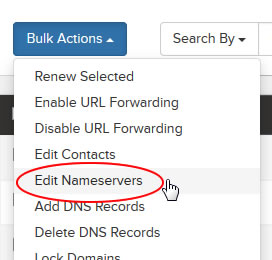
The page you will see next will show you a listing of your domains (as shown below). Click the check box to the left of each domain you wish to change the name servers on. Then click the blue BULK ACTIONS menu directly above.

In the menu that pops down from the bulk actions menu, choose the EDIT NAMESERVERS option as shown below:
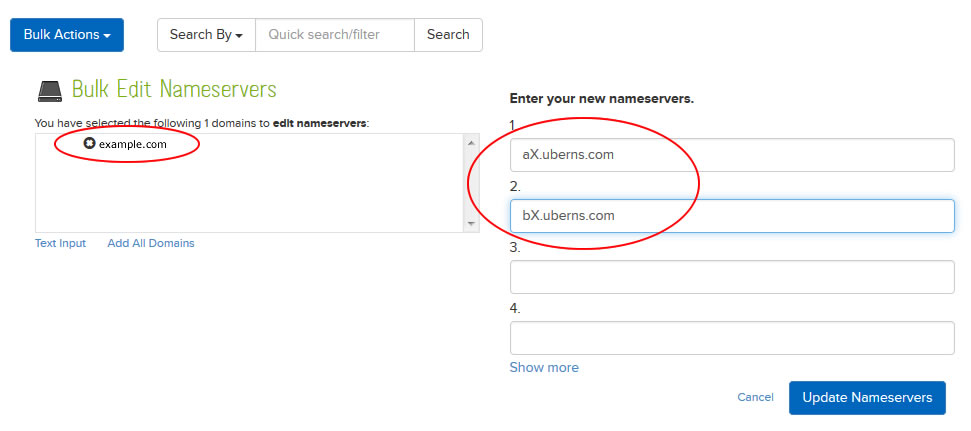
On the following page (shown below), ensure that the large box on the left side of the page only shows the domain(s) you wish to update. Then on the right side of the page, enter at least two of the name servers we’ve assigned to your account, but preferably four. Here the “X” in aX.uberns.com and bX.uberns.com are not actual name servers. In your case, the X will be a unique number. If you do not know what your name servers are, log into the Total Uptime management portal and go to the DOMAINS tab. There you should see a grey box with that information.
Once you’ve entered the name servers, click the blue UPDATE NAMSERVERS button below. That’s it! Within a few hours the domain(s) will be pointing to our platform. In the interim, make sure you’ve properly created it along with all of your resource records so when the switch happens, DNS will be online and ready to resolve.
If you have any questions at all or require assistance, please reach out to us. We’re here 24×7 to help you.