
Often we’ll receive a request from a customer for assistance blocking a specific directory or page on their site from public access. For example, suppose you run WordPress and you want to prevent someone from going to the /wp-admin/ directory. Or perhaps you want to restrict the site from loading if they simply enter the IP address in their browser vs. the proper hostname like www.example.com. Total Uptime Web Application and API Protection (WAAP) makes this all very easy to do with the Deny URL feature. Here are the steps you’ll need to take to implement.
First you’ll want to go to the firewall tab in the networking section. If you don’t see this tab, you’ll need to subscribe to WAF first. At the very bottom of that page you’ll see the Web Application Firewall configuration table as shown below. Click the ADD button to create a new profile if you don’t have one already.
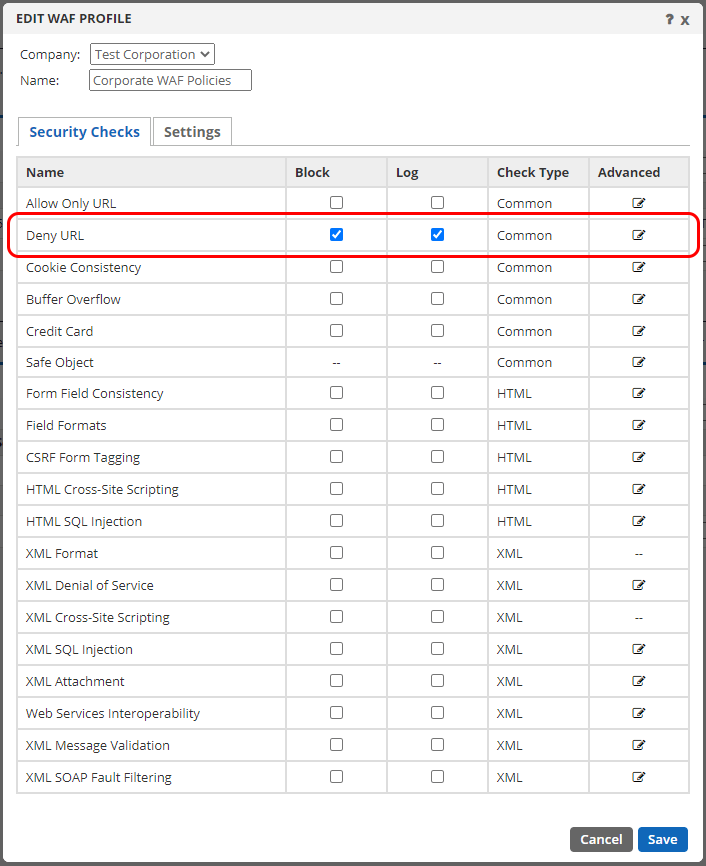
Give the profile a name and save it. Now select it in the table and click EDIT to get to the actual configuration. You should see a dialog box like the one shown below. To complete this example where we want to block specific directories or the IP address, we’ll use the DENY URL feature. Enable it and click the “more” link as shown below.
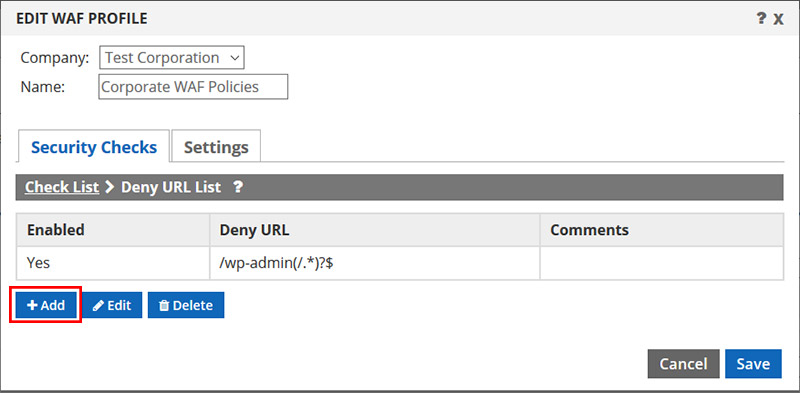
When you’ve clicked the more feature, a separate window will slide into view showing you a table where you can enter security checks. Once you have them created, they will show here. Click the ADD button as shown below to create your first security check.
This will now open a new dialog where you can enter a regular expression to filter out your URL. So, as shown in the below example, we want to block access to the /wp-admin/ directory and everything deeper than that. So the regular expression for that is: /wp-admin(/.*)?$
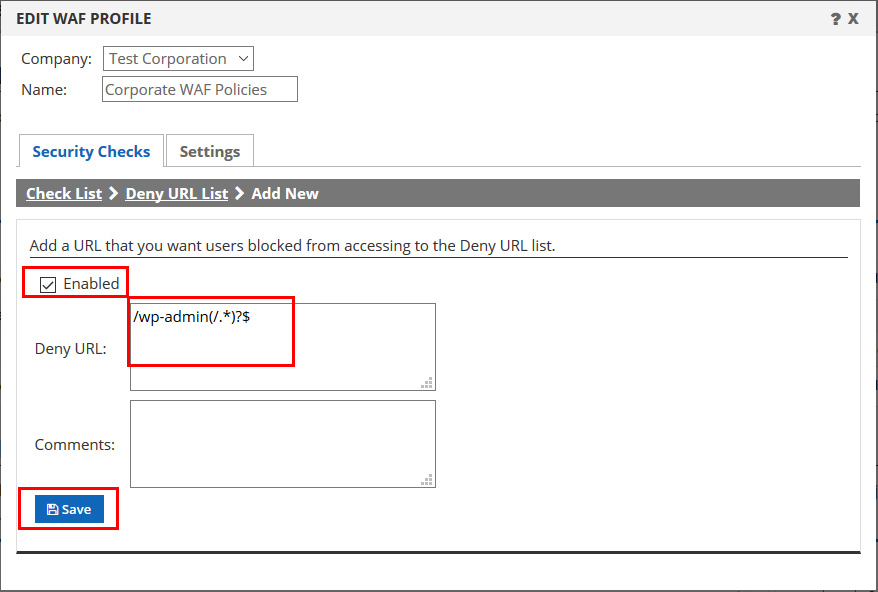
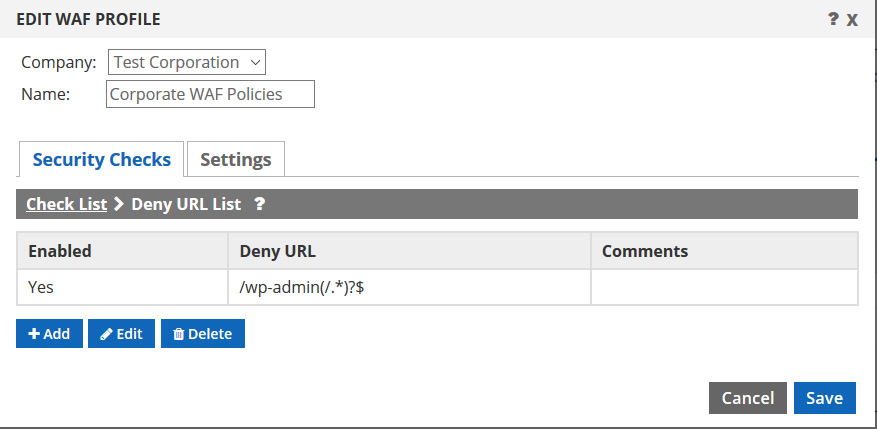
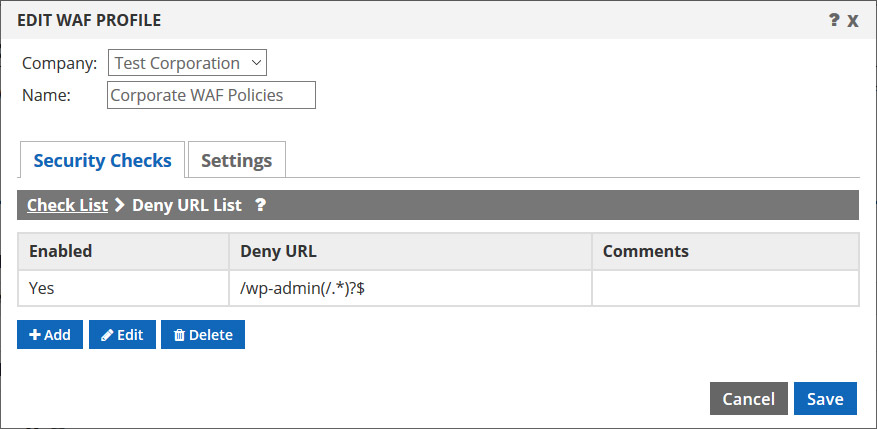
We pasted that regular expression into the Deny URL box, checked enabled and now we need to click the save button. Not the save button at the bottom of the window, but the one shown highlighted above. This will take you back to the main screen where you will see a summary of your rules, in this case, just the new one we created as shown below.
Now you can repeat the process and click the add button again to block additional URLs or even specific pages. In our example above, we wanted to also prevent someone from putting the IP address of the Cloud Load Balancer into their address bar and loading the site. Sure, you could block this with a host header configuration on your server too, but why not block it at the WAF. The regular expression gets quite a bit more complex, but what you need to add is this: \b(?:[0-9]{1,3}\.){3}[0-9]{1,3}\b(\/.*) This will block a dotted IP address and all the directories or pages below/deeper than that.
In my example below you’ll see I’ve added it just like that, and I’ve also added a comment for my reference so I’ll remember what it does, since I’m not a regex guru.
For what it’s worth, you might find this regex test tool quite useful. https://regex101.com/ Here you can test building different regular expressions and test them out with a real URL you might use below. It immediately confirms whether a it will work or not. See my example below.

In this example I pasted the regex I wanted to test for detecting an IP in the URL. I then entered my test string/URL below using an IP address. It highlights in blue that it matches on the IP, and then in green afterwards confirming that it would also catch anything below. There right-side of the regex test tool page linked above shows more detail.
We’re not done yet!
Once you’ve added all of your security checks, you still have two steps left.
First, you should click the BACK button on the DENY URL dialog, as shown below, so you return to the main WAF profile settings screen.
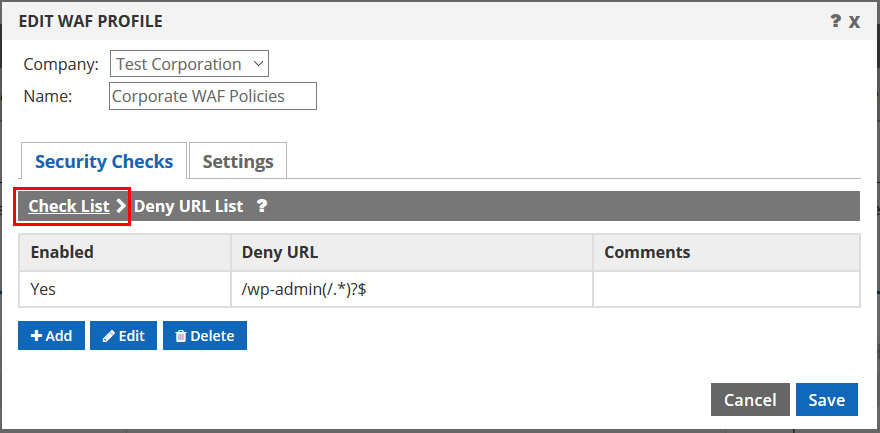
Yes, you could have clicked save to close out the whole dialog, but if you want to add different rule types (block credit cards, SQL Injection etc.) you need to go back, so that’s why we’ve shown that step above. After clicking back, you’re at the main screen again as shown below.
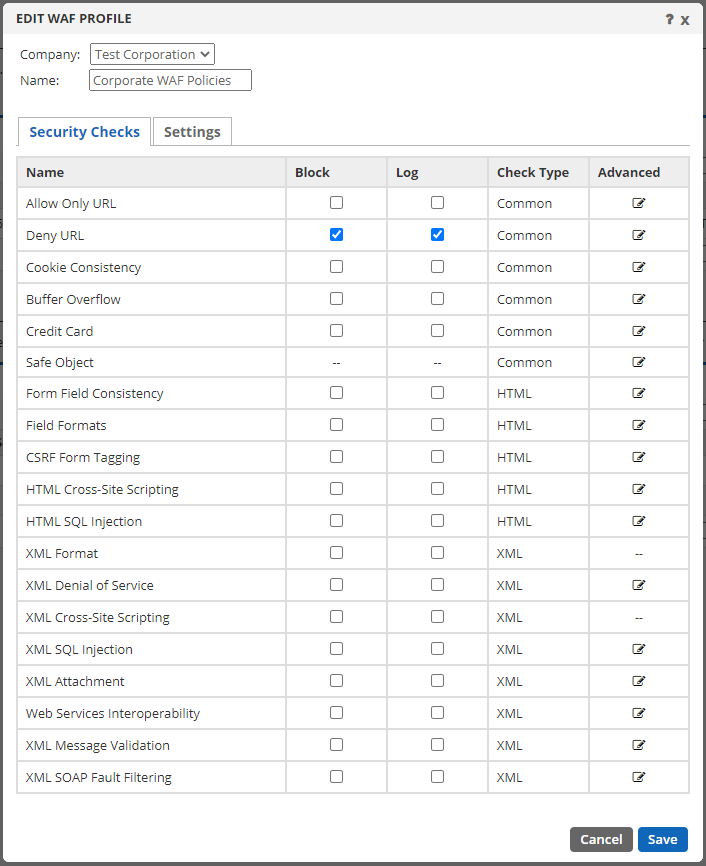
From this point you can now click save to close this completely.
Last step!
Now that you’ve created a WAF profile, you need to attach it to your pack/config. Until you do that, it won’t have any effect. We have this extra step because the granularity of letting you attach the same WAF profile to multiple packs/configs, or different ones is very handy.
So back on the main page of your config, click on the Firewall icon as shown below:
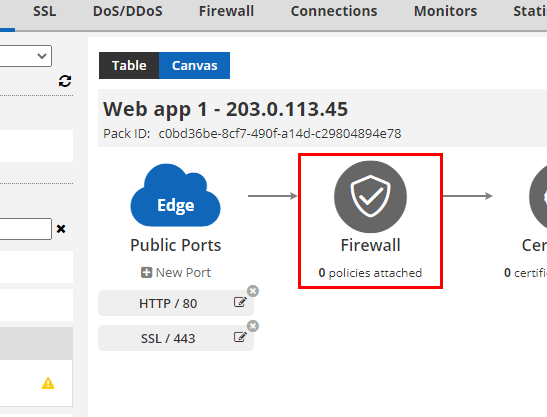
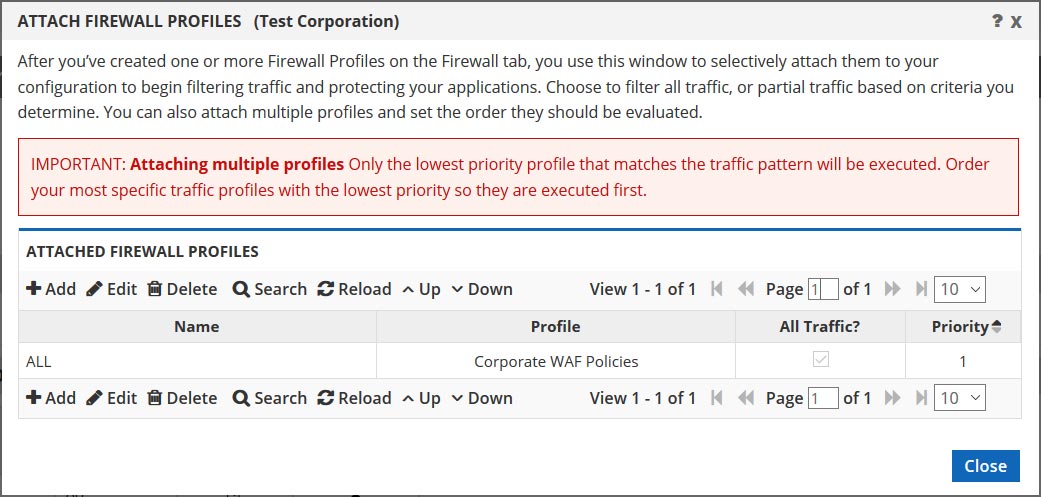
This will open up a dialog where you can now attach your newly created firewall profile to this specific config.
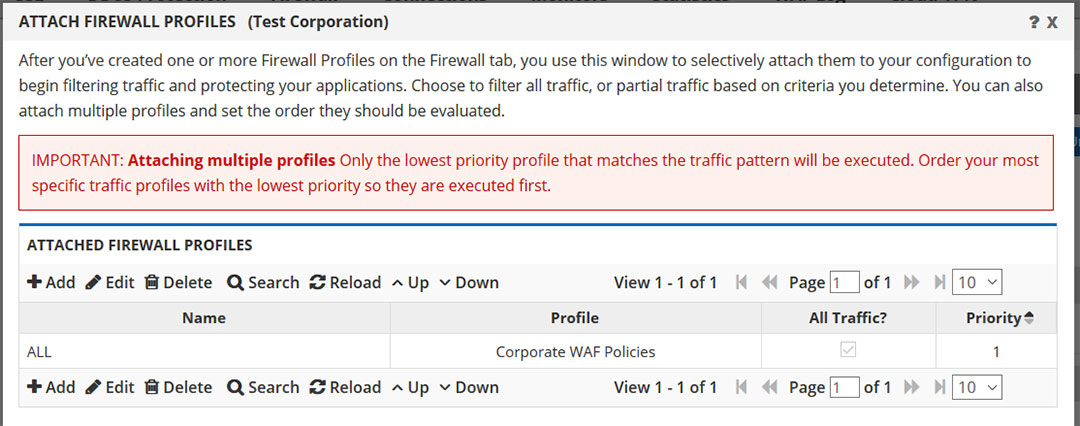
Click ADD on the tool bar shown in the above image, give the new attachment rule a name for easy reference, choose your newly created profile from the drop-down menu, check to Apply this profile to all traffic and click save at the bottom of the box.
Within a few minutes your new rules will take effect!
PS: Someone recently asked about the regex and if it was case-insensitive and if forward slashes / needed to be escaped with a backslash \ before. The answer to this is that neither matter. You can create your Deny URL for /admin(/.*)?$ and it will block attempts to go to the page /ADMIN/ or /AdMiN/ etc. So just build your regex in lowercase and know that everything is covered.
Additionally, there is no need to escape the forward slashes, but you can if you like. If you put \/admin(\/.*)?$ it will work just the same as if you did not. So why not keep it clean and simple and skip the escapes : )